I wanted to do a sort of self analysis/breakdown of my process and reasoning of my Ystra - Astral Witch character. Not only so I can look back on it to evaluate myself, but also in the hope of assisting others in the creation of their own projects.
This analysis will contain many images that I’ve saved of my progress throughout working on the project.
How long did it take to make it?
The project started in early Jan of 2021, and though I stopped working on it for most of 2021, I picked it back up again in Feb of 2022. Adding all the time I worked on it together, it was approximately 3-4 months of part time work.
What Programs/Tools did you use and where?
Maya and Zbrush for modelling/posing. Photoshop, 3DCoat, and a little bit of Substance Painter for texturing. Marmoset Toolbag 4 for baking and rendering.
Picking the Concept and Starting the Project

Why did you pick that concept?
Ystra was one of a few concepts I was considering done by Alexis Pflaum. They were simple, visually appealing, and engaging. I settled on Ystra because I liked the overall colour composition the most.
What were your goals with the project?
I wanted to create something slightly out of my comfort zone while also practising painting contrast and materials.
I felt like it was out of my comfort zone as I usually tend to stick to very simplified characters, Ystra was a deceptively simple character.
Why did you pick Handpainted as the style?
I knew, when selecting what to make, that I wanted to try and mimic the concept as closely as I could. This automatically steered me away from any PBR based pipelines as I didn’t think they would fit as well.
What I was left with was either a flat cel shaded style or handpainting.
To pick which would best suit my needs, I looked at how I intended to present my final model.
- I wanted to do renders in Marmoset
- I intended to upload the model to Sketchfab
- I didn’t want to bake in details
Either style would let me get away without baking details of any sort, so I looked at the first two targets. I felt a flat cel shaded style would end up too flat and unappealing without some shaders to support it and give depth.
Being left with handpainted, it allowed me to pick the range of detail I wanted while adding all the material definition, and lighting, without the use of shaders. The downside being this would also limit how I would get across the same feeling of the spectral arms from the concept.
Did you encounter any issues with the style?
The biggest issue with the style was refraining from going into too much detail. The aim was to keep it simple and clean. There were many times I had to pull back and repaint parts due to hyperfocusing in one spot and adding too much detail. There were also points where I felt parts were too simple and had to stop myself from adding too much. Sometimes this involved stepping away for a bit.
Art Direction
After selecting the concept and art style, I looked up references of what I wanted to achieve and how others had gone about doing so.
My biggest inspiration was how Genshin Impact characters were created. Although they used a far flatter anime style, I tried to mimic a similar style in handpainted. This included things from how they constructed their face/eye models, keeping details to a minimum, and large clear shapes.

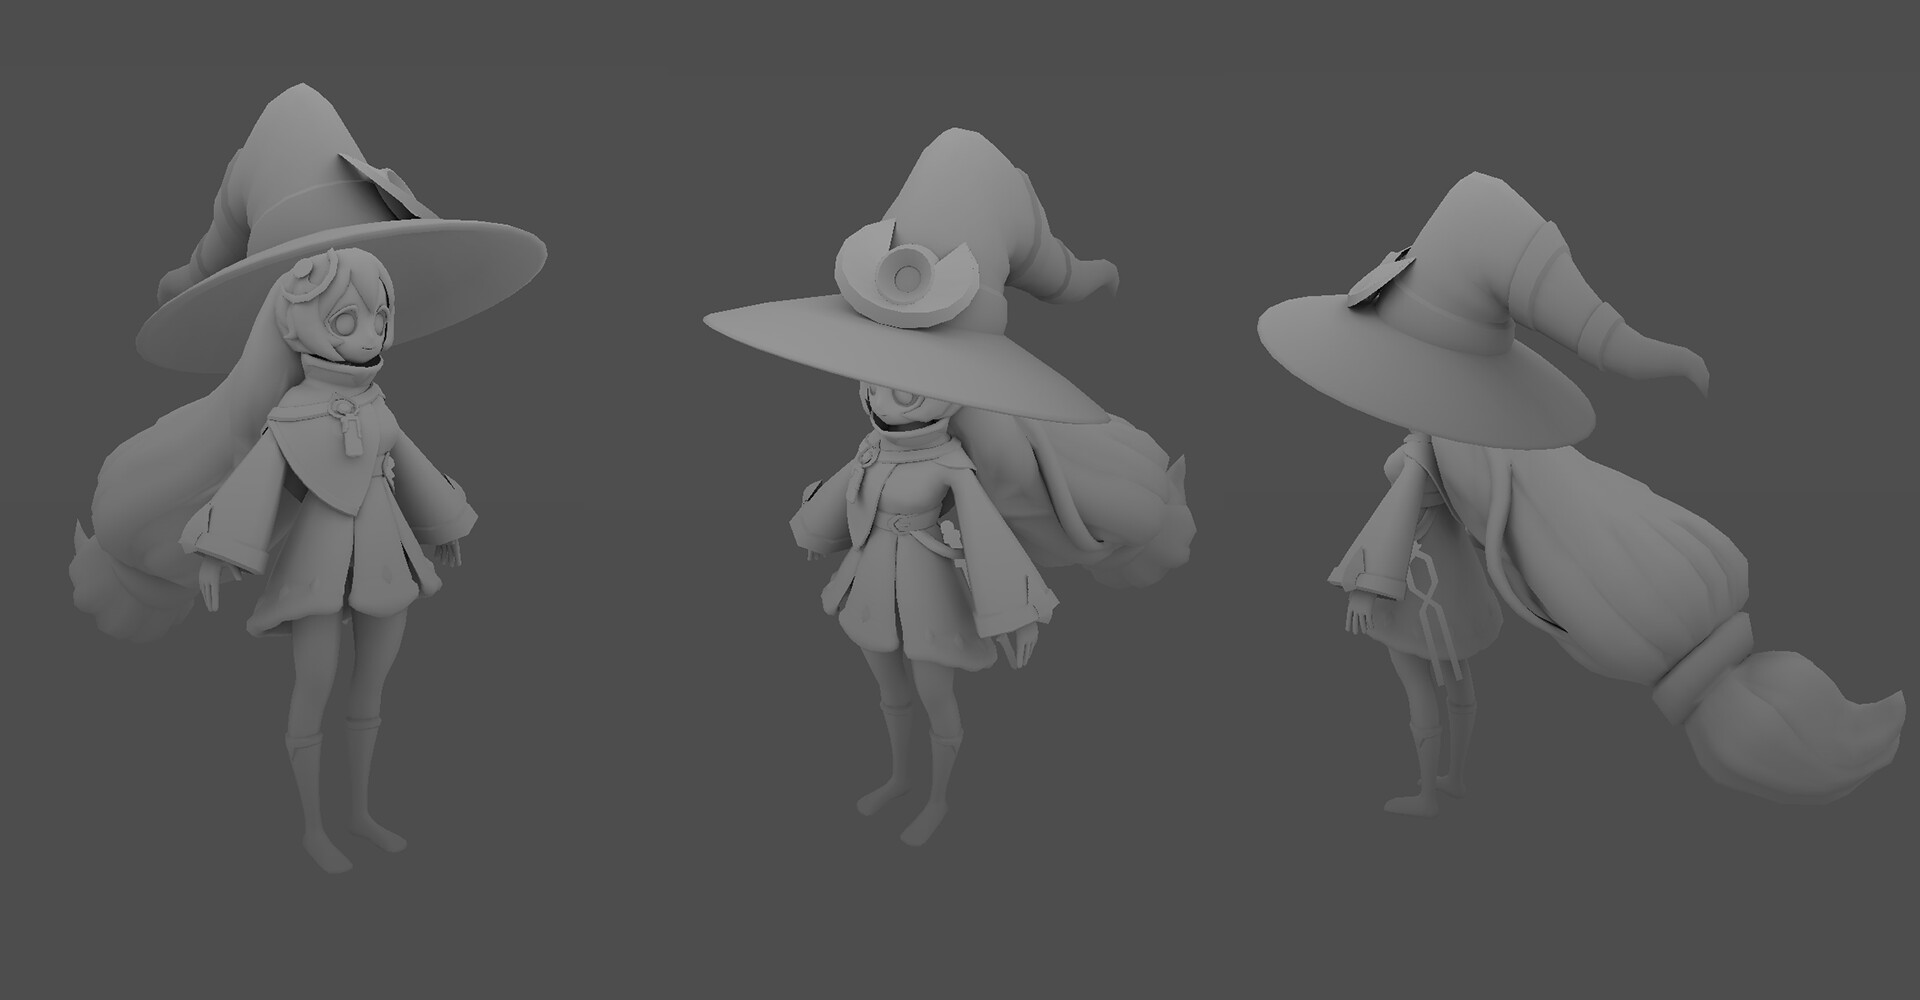
Blocking out and Topology
For my own sanity, although I could box model in Maya, I found it easier to set up a base mesh in Zbrush and work from there. This allowed me to easily tweak various parts of the body to ensure I had correct proportions.
The most important part was getting the body/head proportions correct; if these were off it’d throw off the balance of the model.
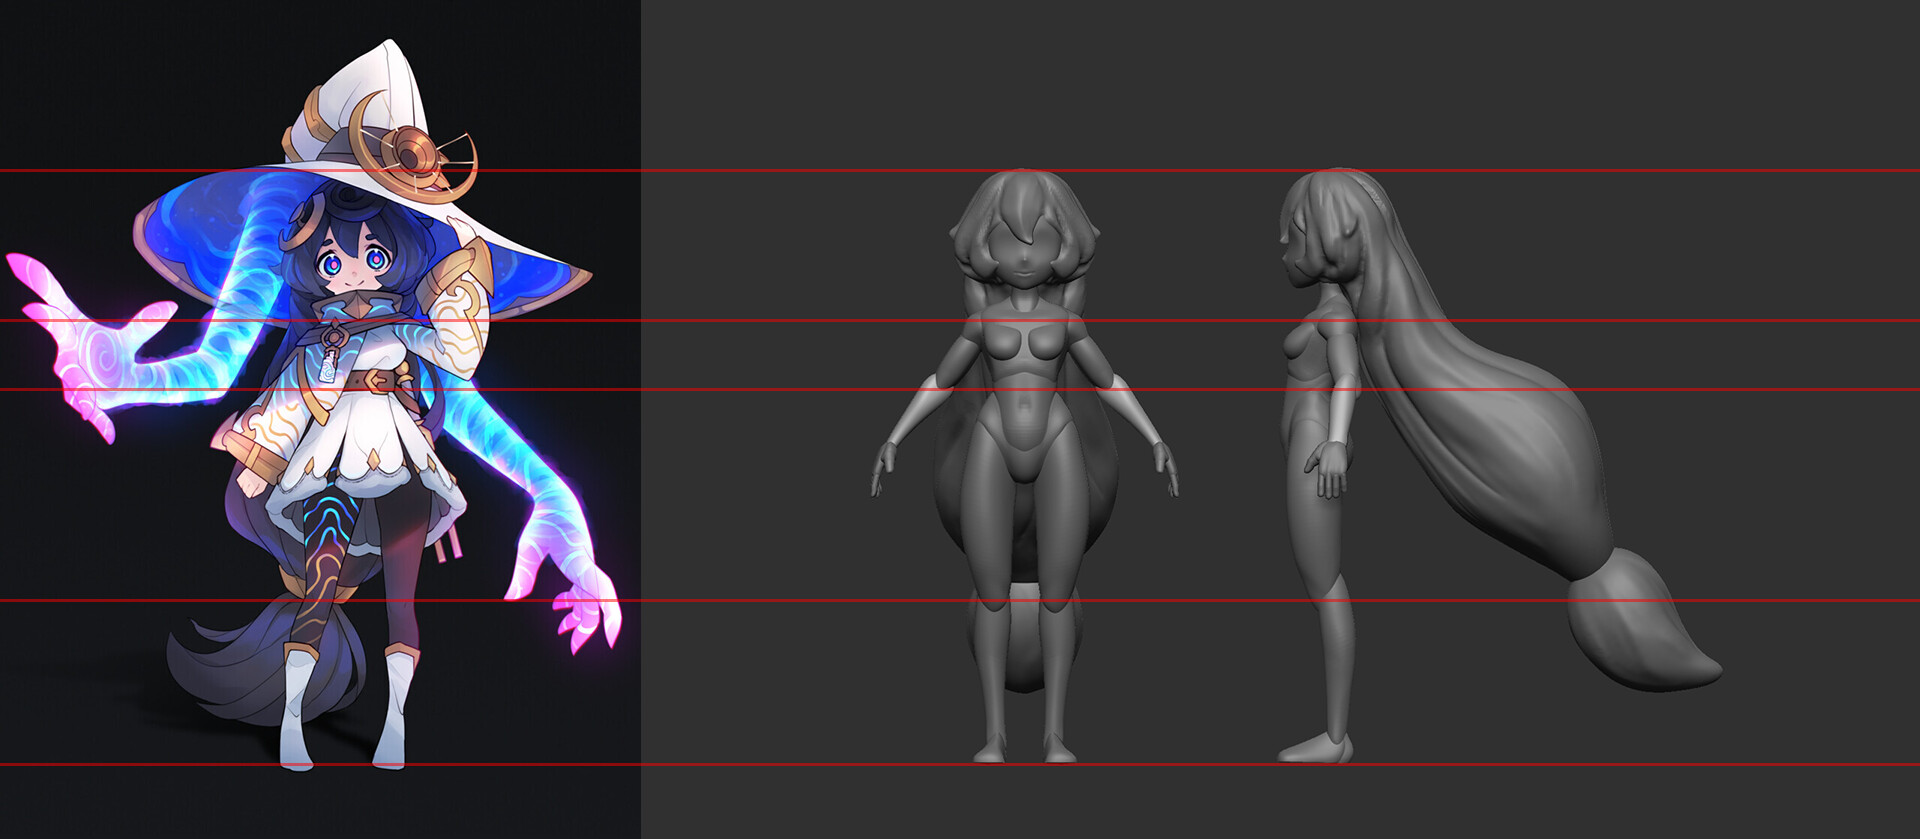
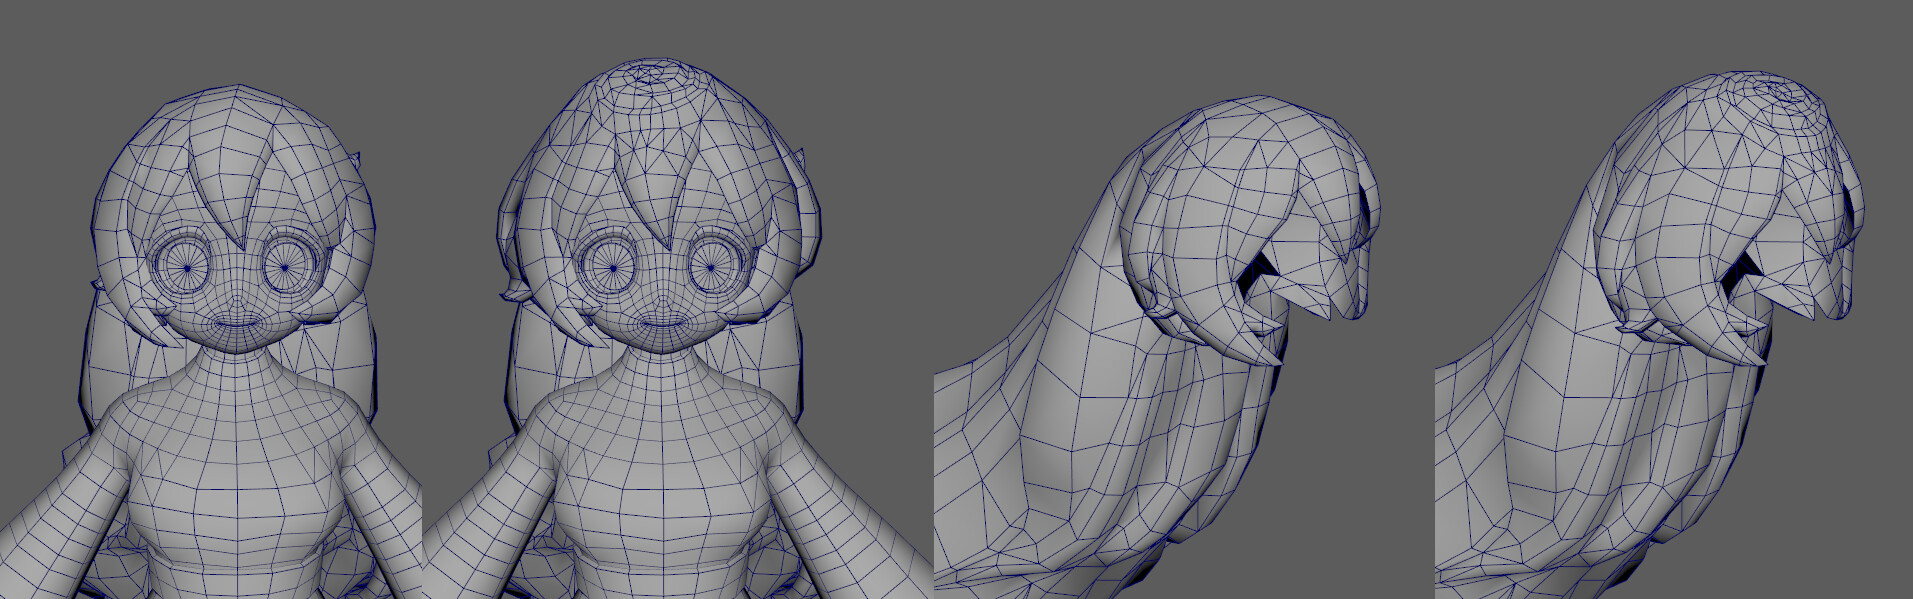
After I was happy with these proportions I went ahead and retopologized the body so I could work with cleaner shapes.
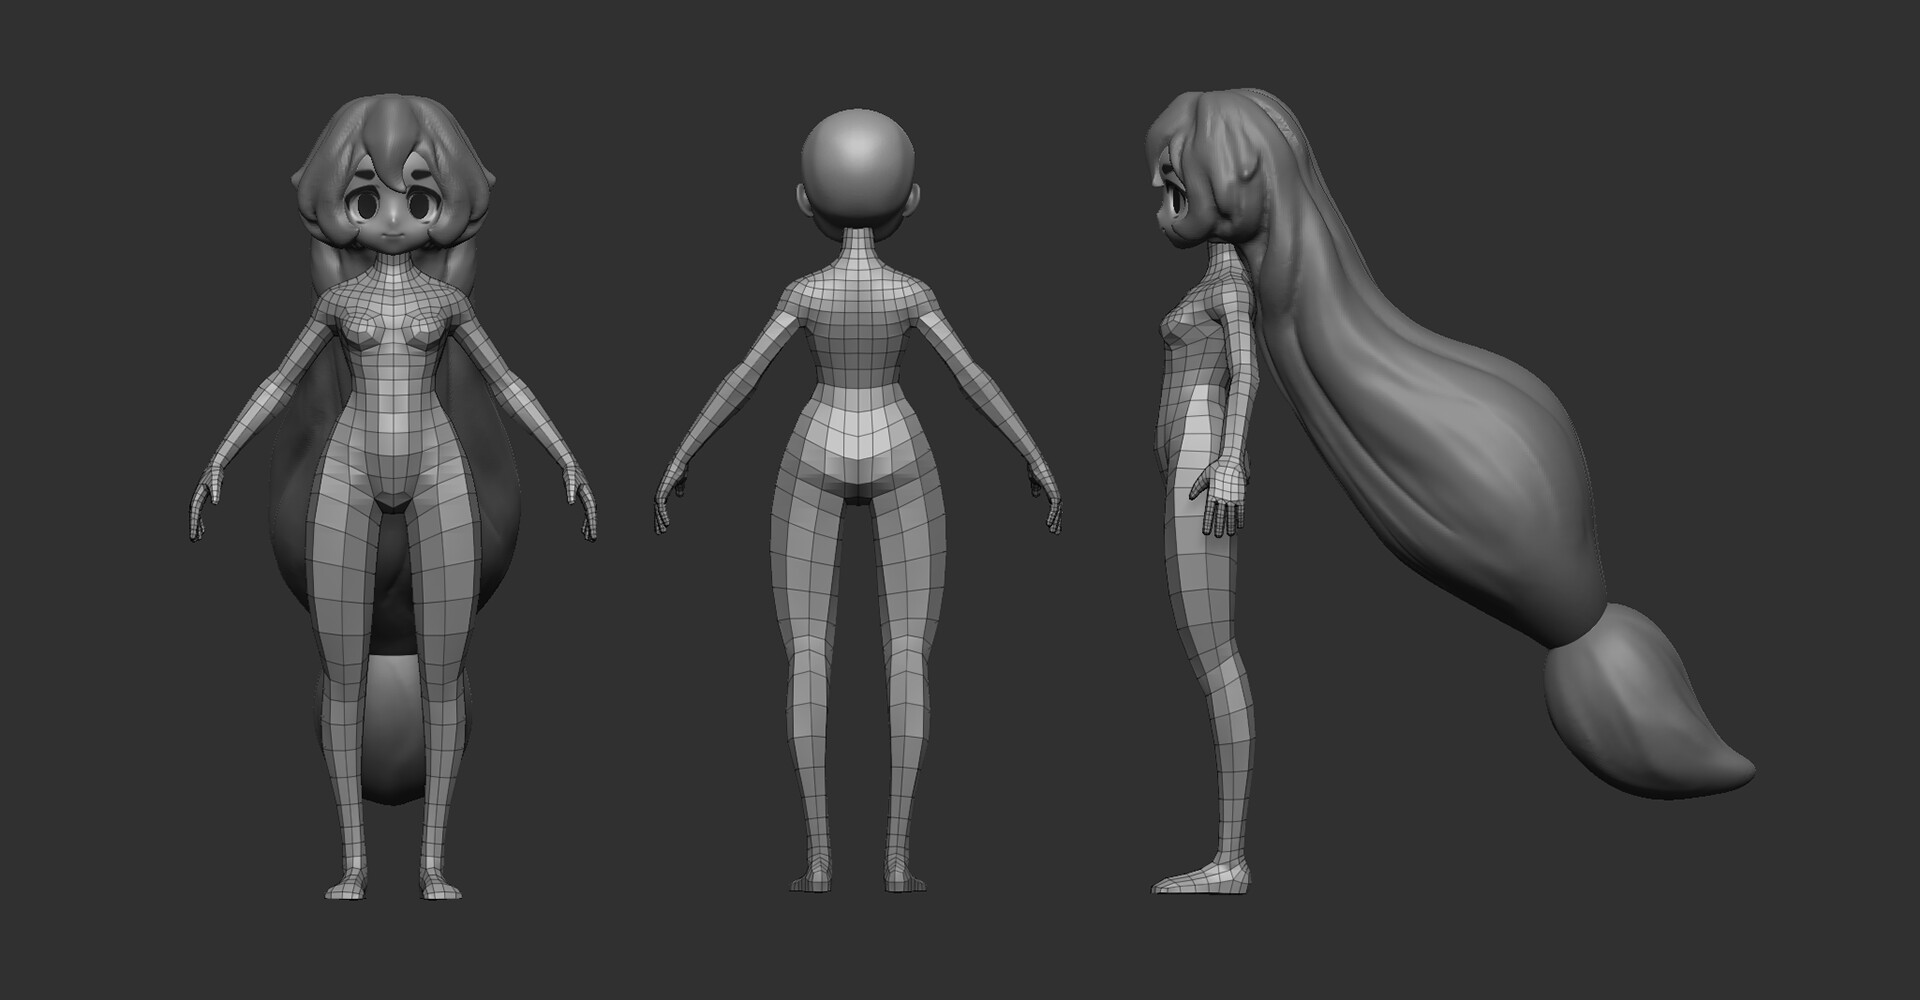
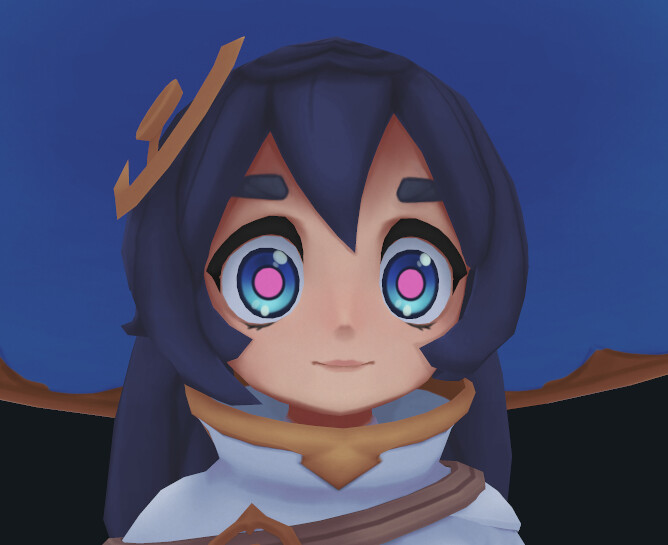
When it came to doing the topology of the face, I had to look back at my research on how Genshin Impact characters were made. I wanted that anime-like look so I had to ensure the eye cavity was inset and larger than the eye itself, with the pupils/irises on floating geo. This allowed the illusion of eyelids at certain angles.

With the base body being complete I could focus on creating the outfit. This would involve duplicating and extracting porting of the body geo to create things like the dress, shoes, and showl.
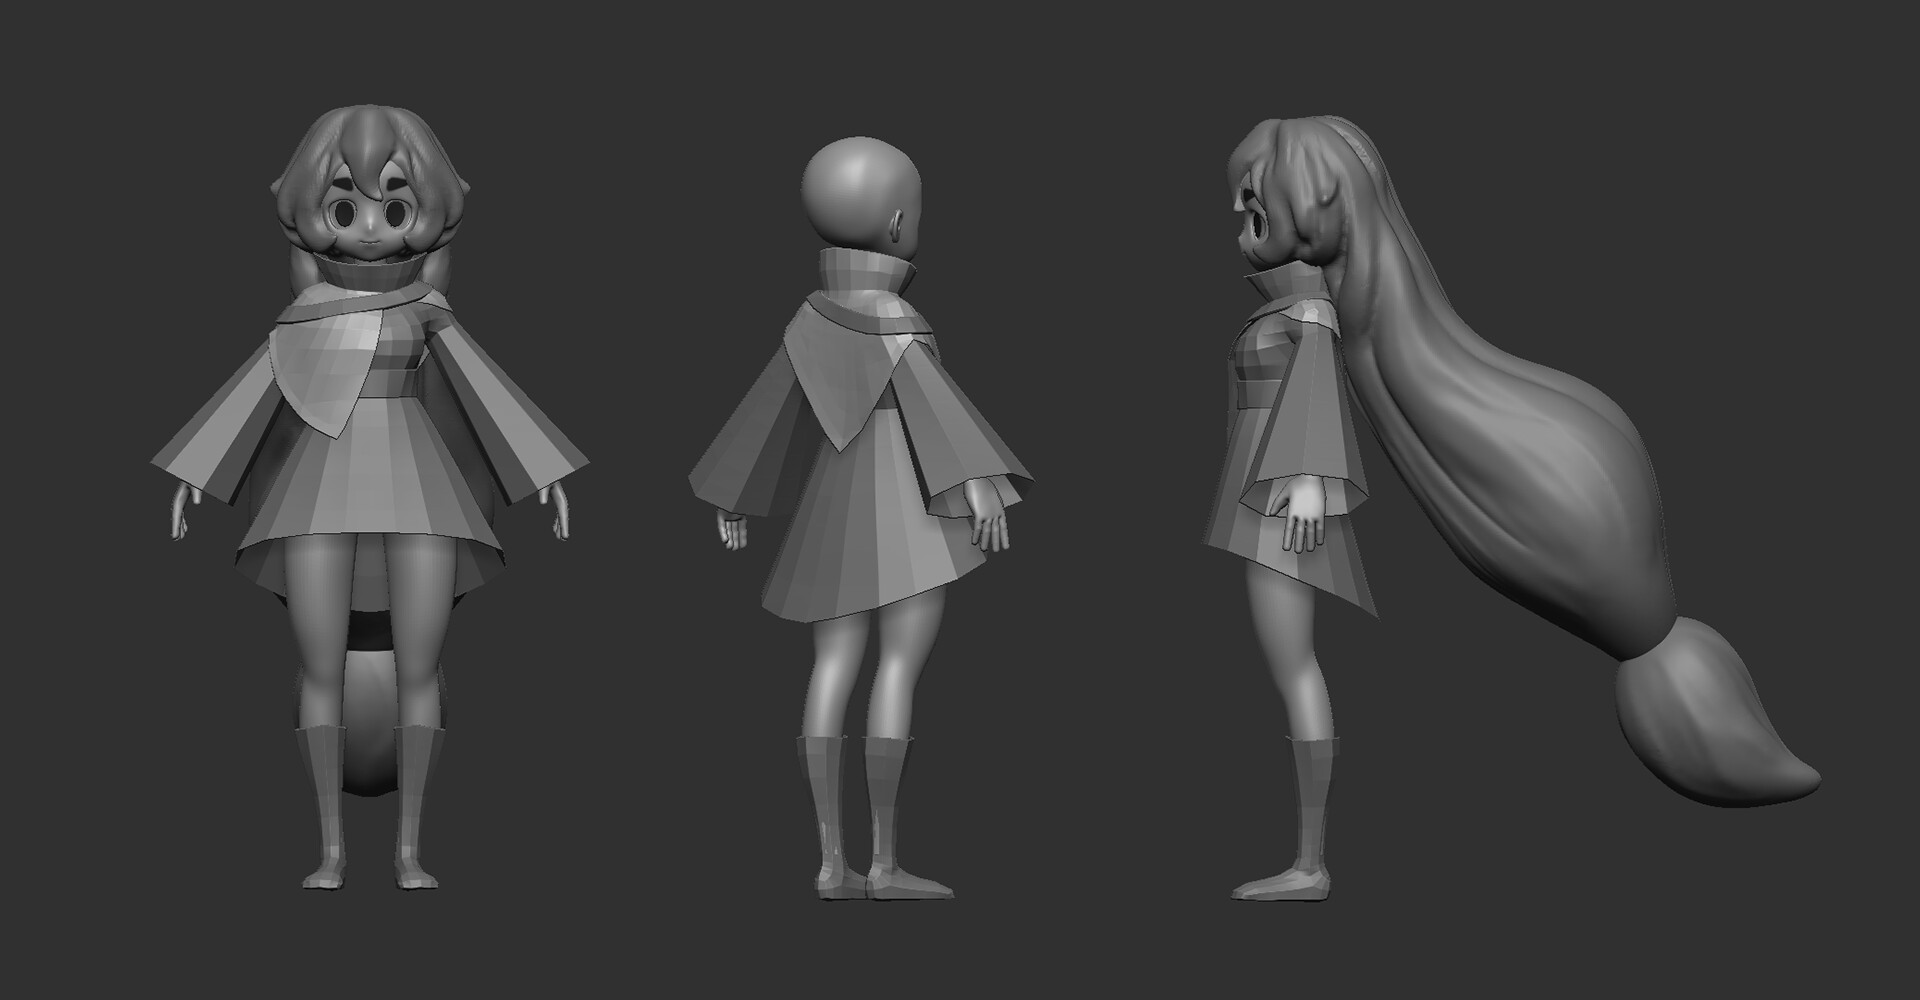
Once I finished the base meshes, I could add the bare minimum of detail that would be needed. These details only included things that would add to the silhouette of the character, or where I knew I wanted to have details in the texture (folds/creases in dress).
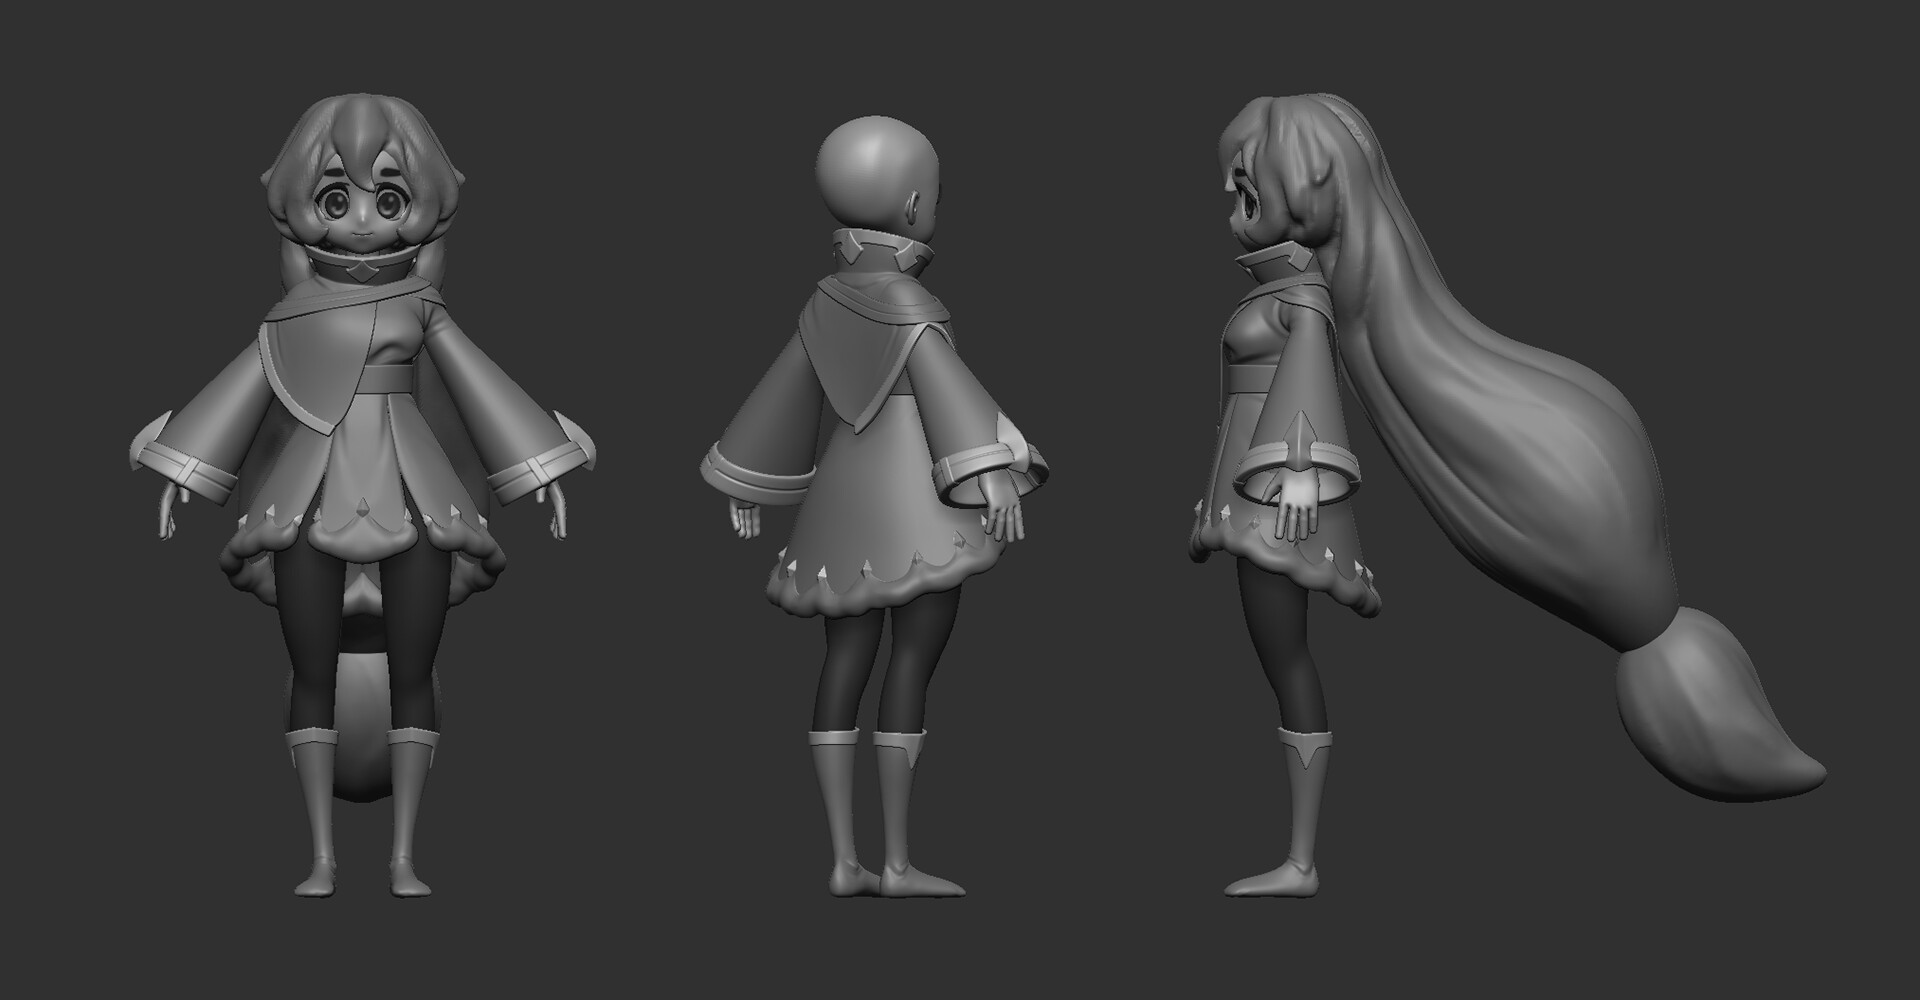
A finished blockout then means retopology. Because I started with rather clean topology, it meant I had minimal cleanup. It was here that I also poly modelled other parts.
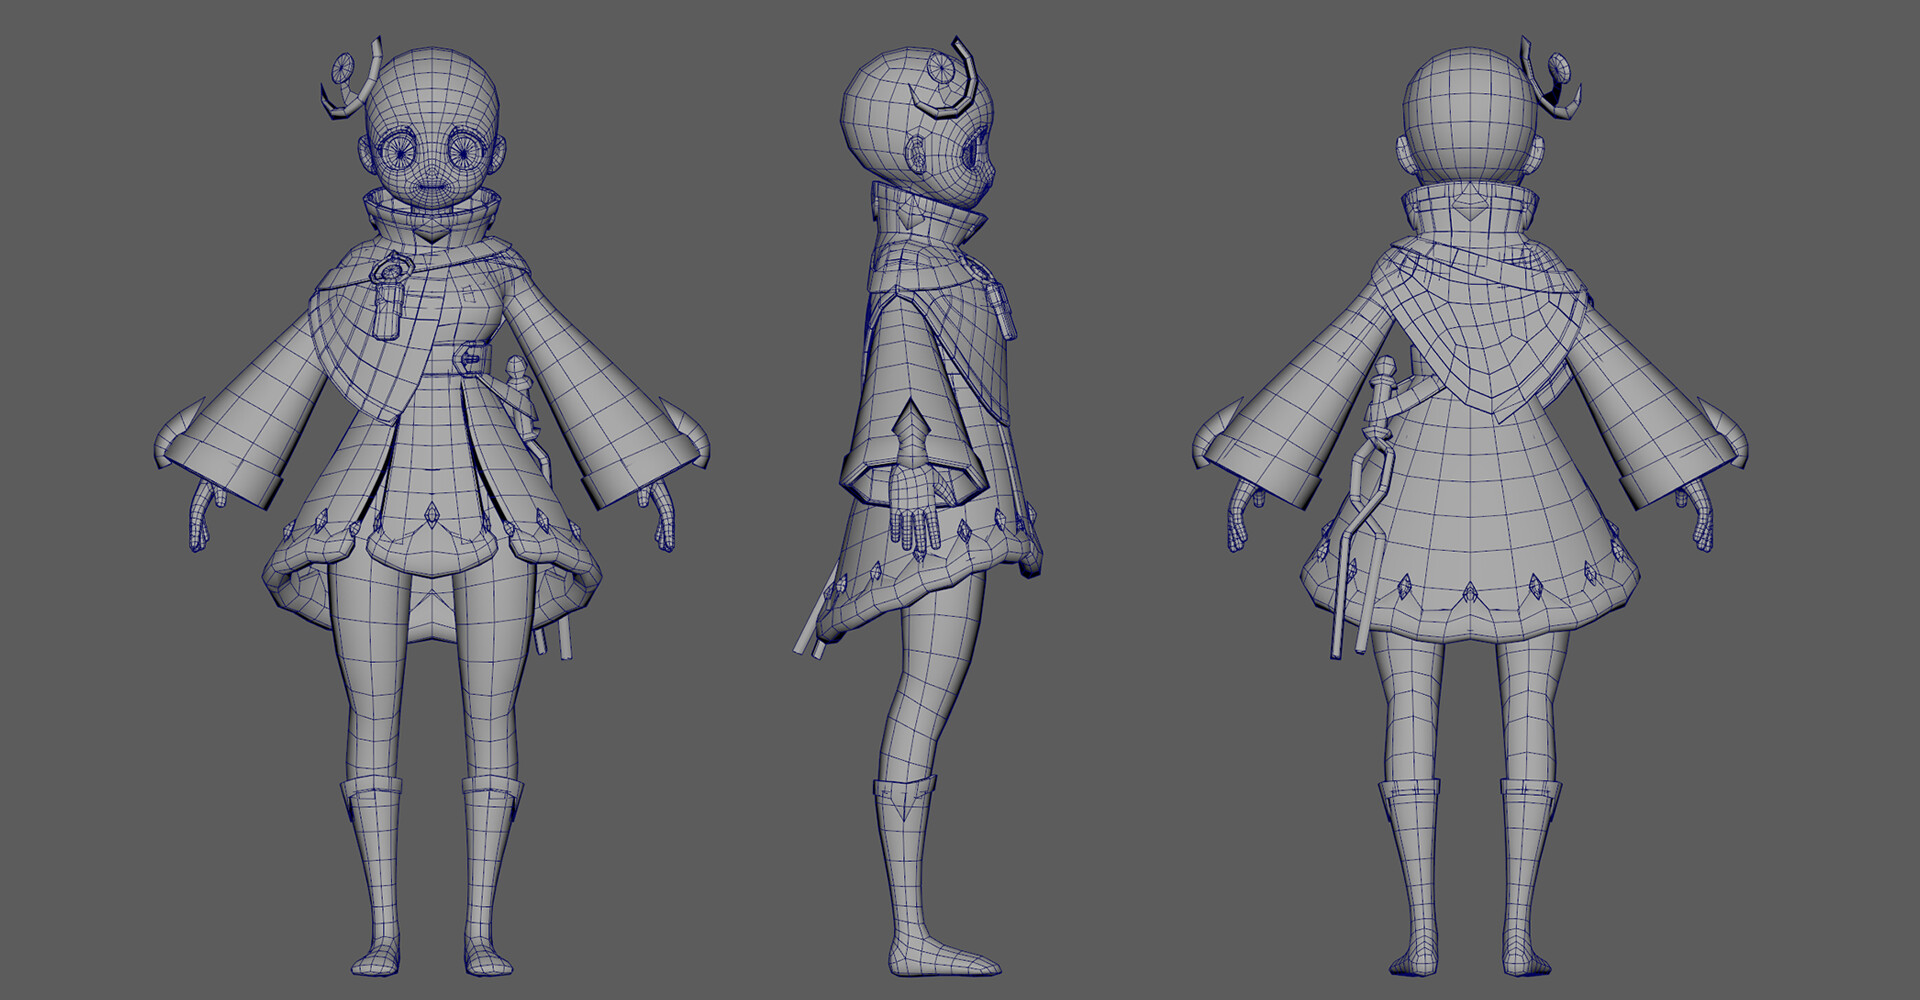
After taking a short break, I came back and found I wasn’t happy with how clean the topology was, so it was refined further. At this stage I also finished the hair and hat.
I didn’t set a limit or goal for my poly count, so I kept it low enough to hold shape, but not excessively low.
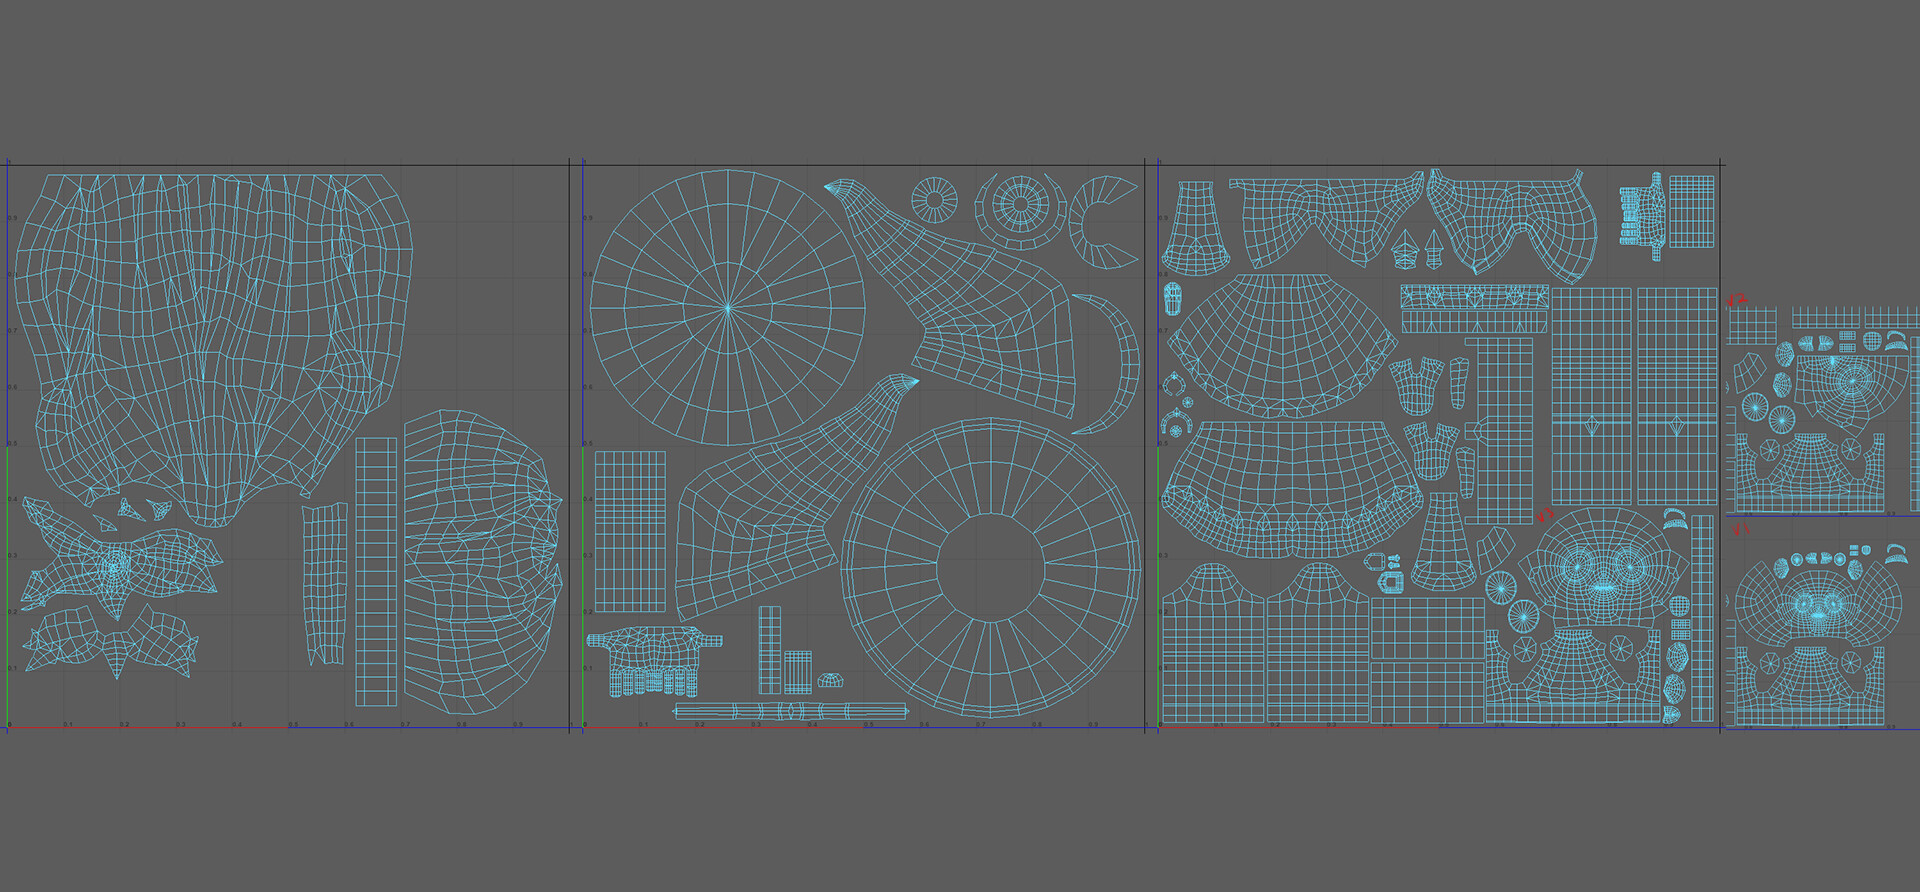
UVs and Texture Sets
When setting about doing UVs, I also had to think about fitting them all together and what the density would be like. If they were too small, I wouldn’t be able to add detail. If they were too big, I wouldn’t be able to fit them all in the texture.
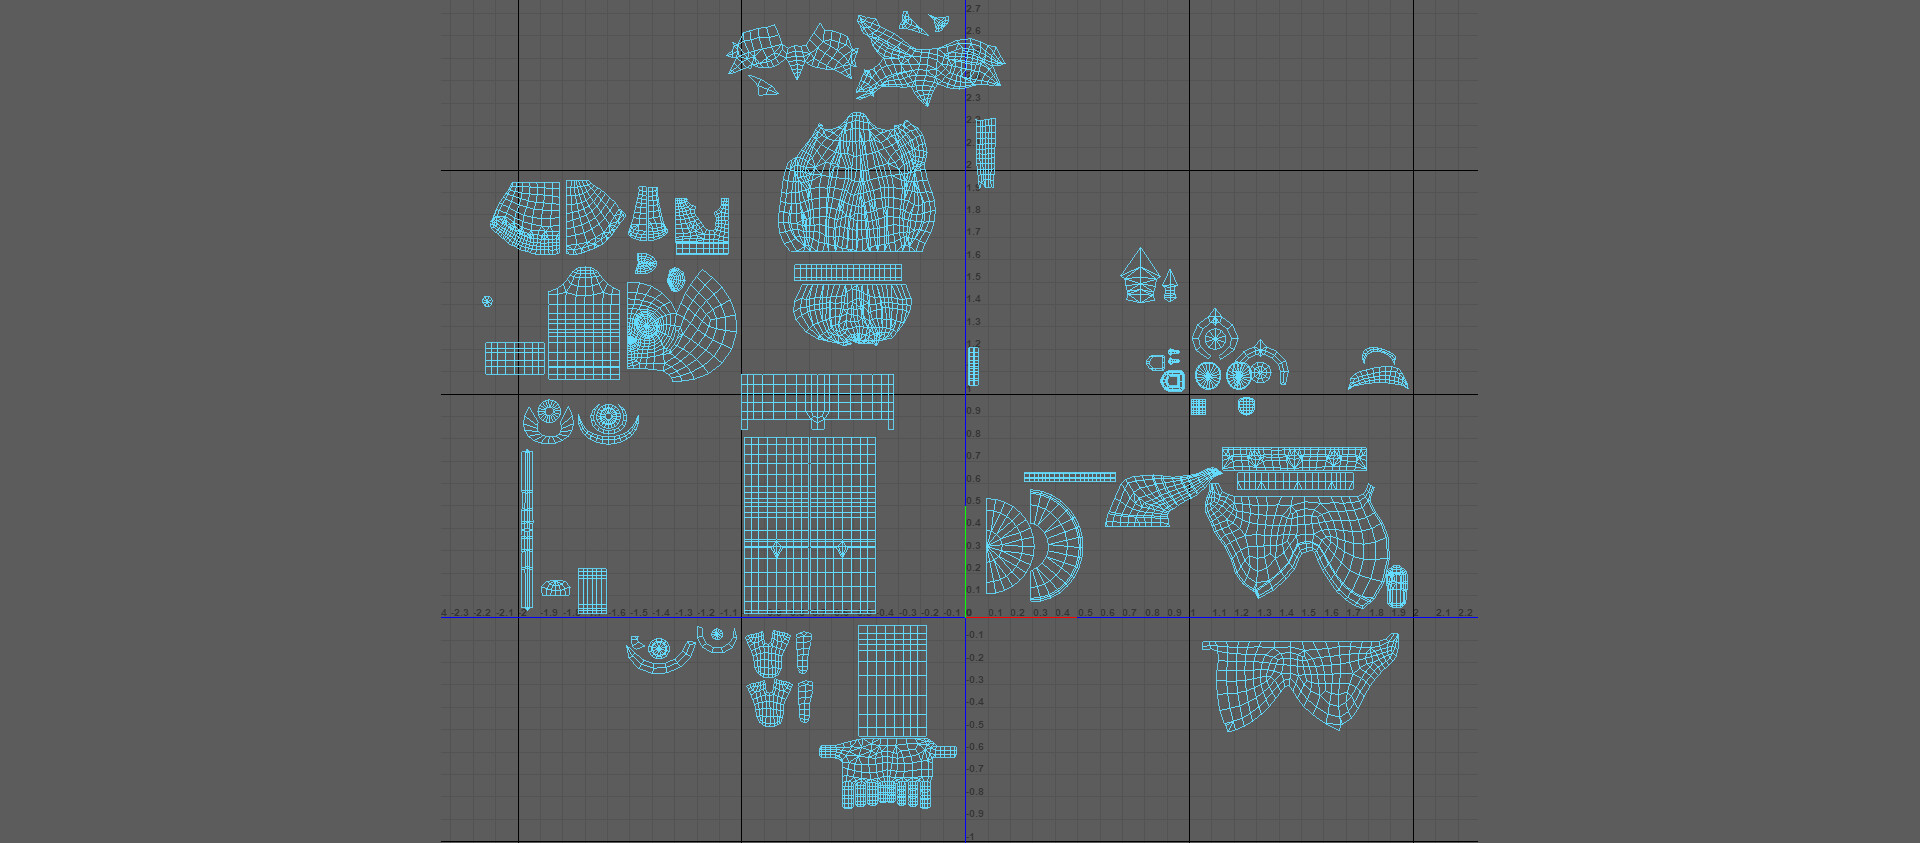
I ultimately decided on using 3 Texture Sets to split them up; Body, Hair, Hat.
To decide what goes where I asked:
- Is it hair or on the hair?
- Is it needed on the body? Could it work without it being there?
- Is it part of the hat?
This allowed me to group the essential things like skin/clothing into the Body texture, while the hair and hair accessory had their own to keep density. The hat and spectral arm was then given a texture along with the weapon/weapon strap. I put the weapon here because I felt that I could take it away and the model would still work without it.
The UVs, more specifically the face UVs, got edited and moved around from their initial placement. At first being symmetrical/mirrored to later (after I started texturing) allowing asymmetry.
Baking and Greyscale
Baking was kept very simple for this model. In 3DCoat, I did a basic Ambient Occlusion and Curvature bake mixed in with a top down gradient to draw attention up to the face and hat.
Using overlay layers, I blocked in the various values of the different materials on the model. I kept these areas clear and easy to read at a distance.
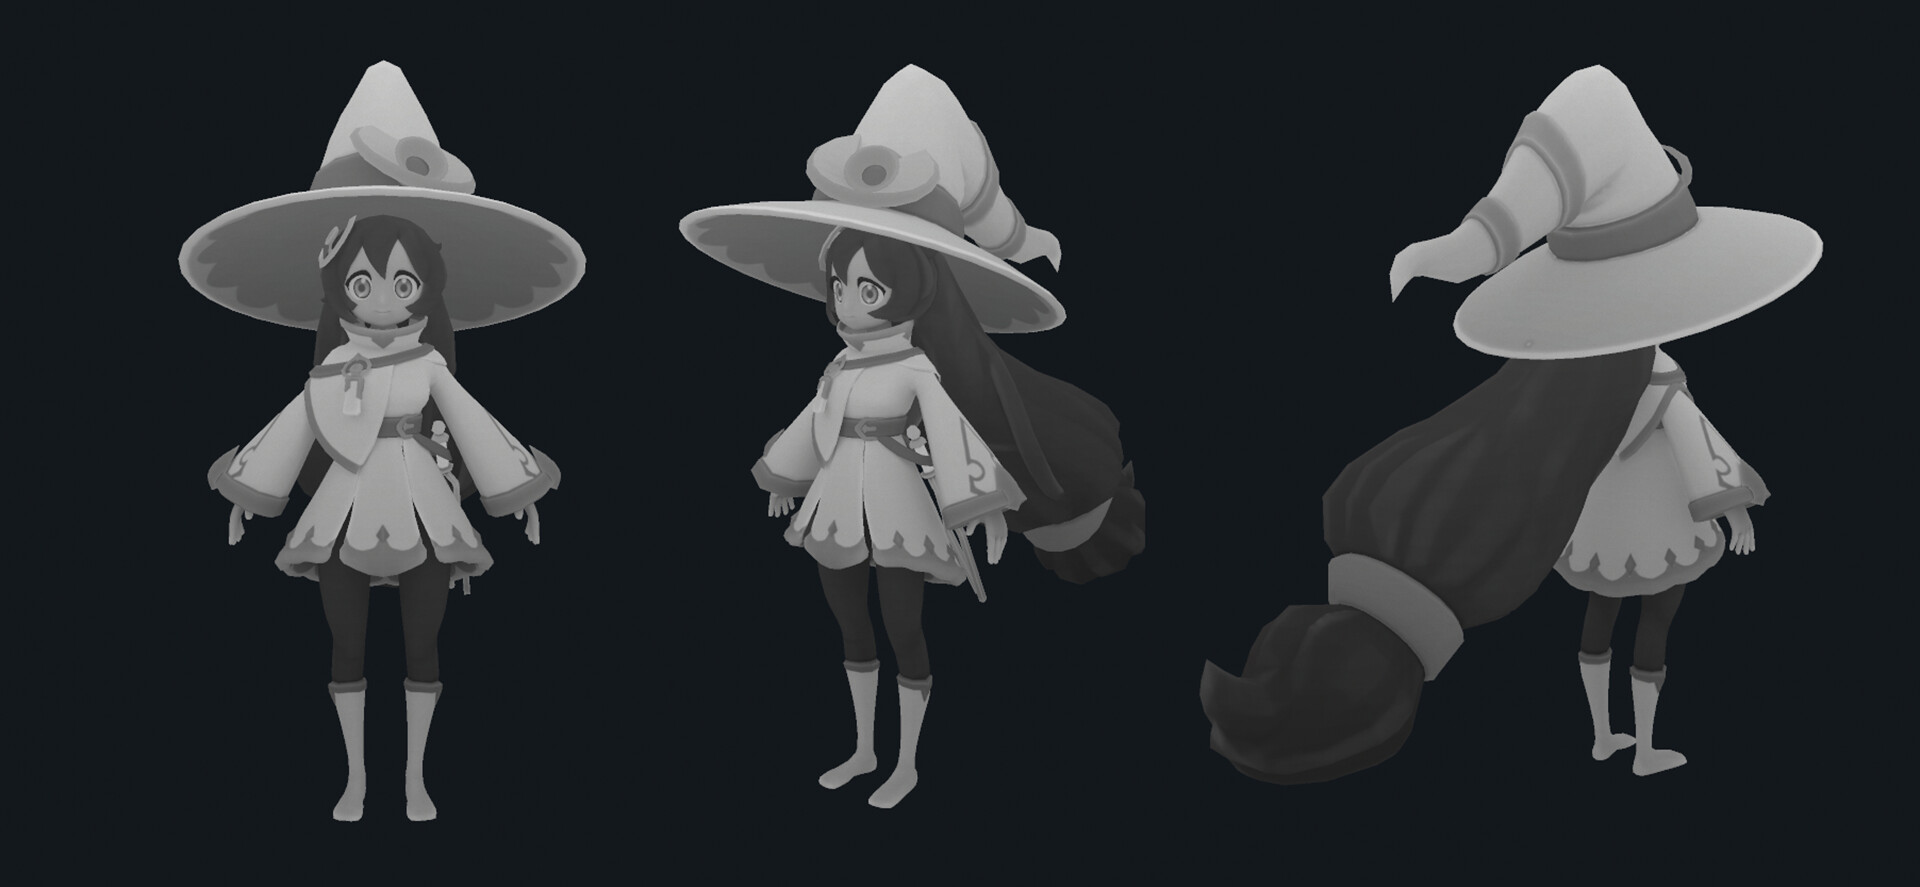
After the base value blockout was done, I could go in and paint in finer details: seams in the clothing, folds and creases, details on the metal, the face, etc.
I didn’t feel this was done and wanted to push the light values more. This was where I took the model into Marmoset and did a Light Direction bake to add to the diffuse.

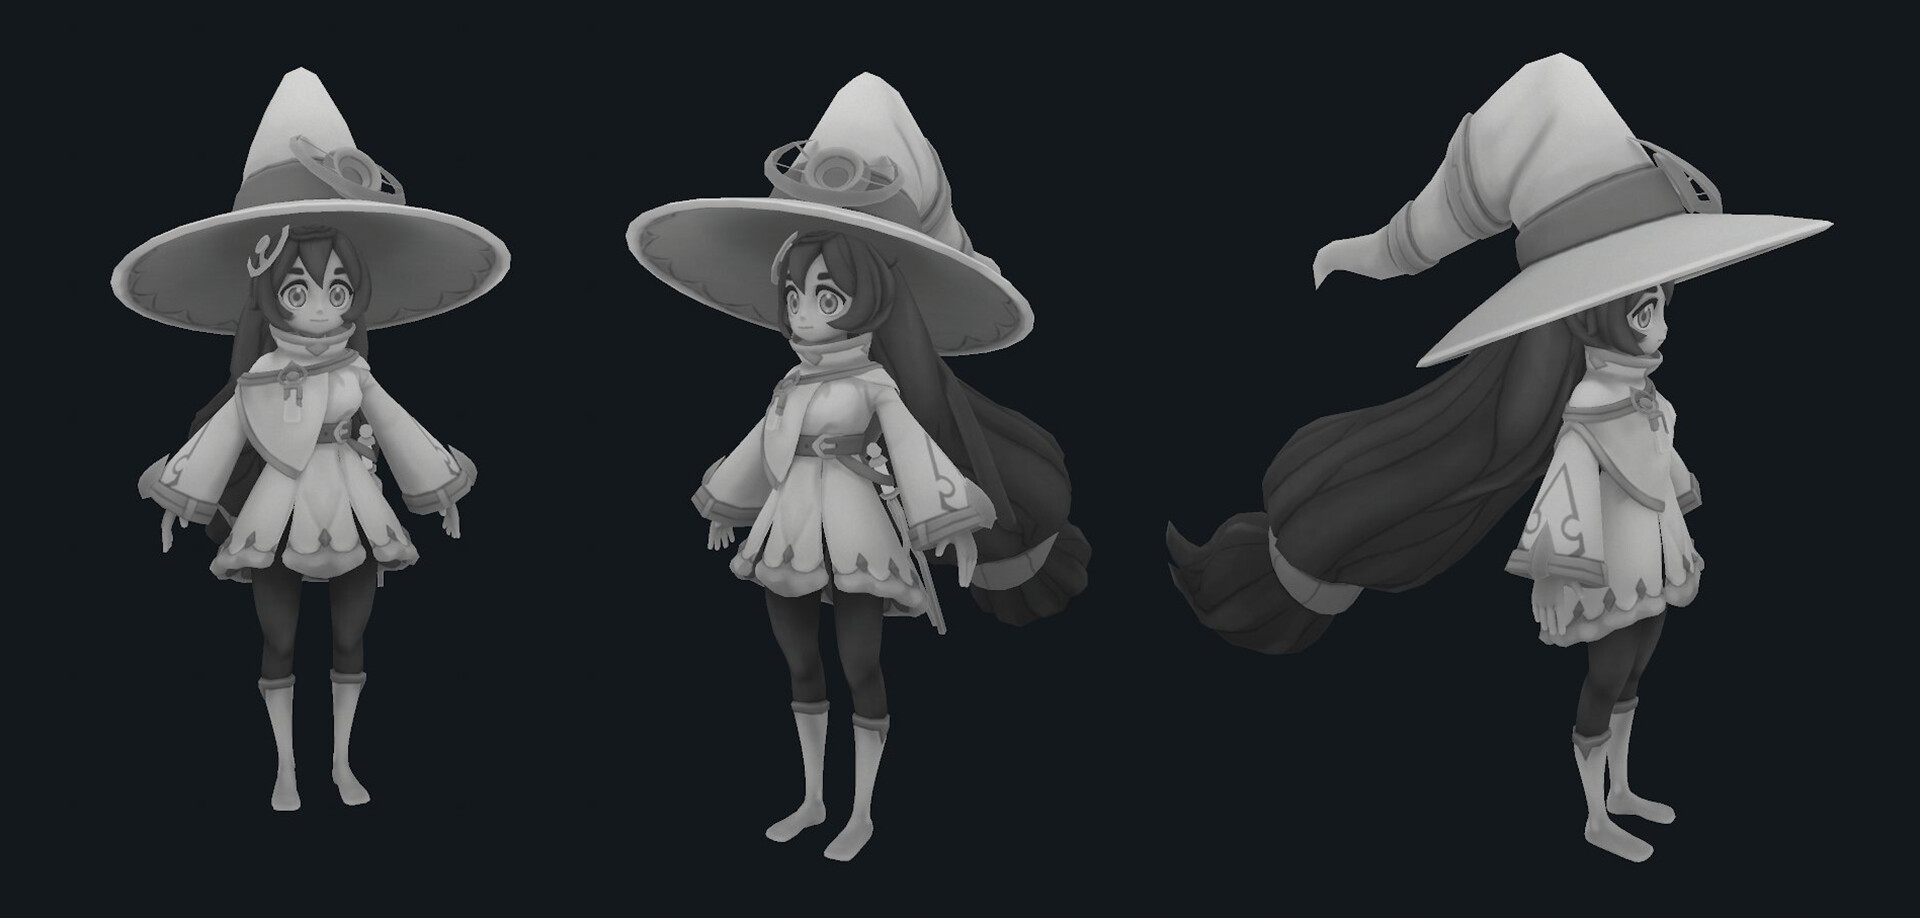
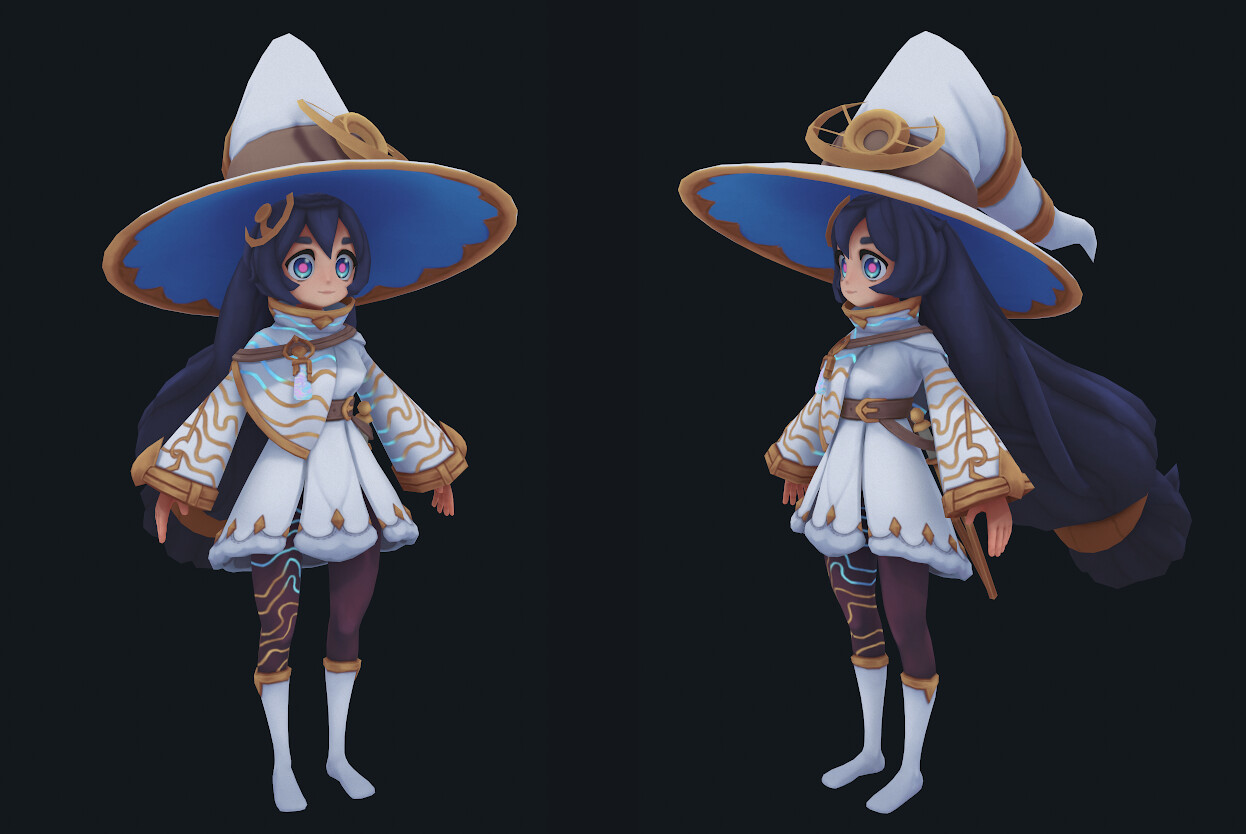
Adding Colour and Painting
With the greyscale all set out, the fun part is adding the colour and painting!
To add colour I utilised gradients and layer masks in Photoshop to isolate areas and apply different colours.
During the whole painting process I would swap between 3DCoat and Photoshop to paint various aspects.
On every character I make, I always start with painting the face first. No particular reason for it, I just do.
The next thing I worked on was the dress. I wanted to get this out of the way as it consisted of the most details. This means cleaning up the shadows and adding further material definition.
Adding the squiggly lines to the dress was the most time-consuming thing. Where there was shadow, the lines would be blue. It was during the process of painting these lines that I took a year of hiatus on the project before coming back to finish them. During this period, I would occasionally come back to tweak and paint various areas of the model.
With the body done, I had to paint the hair. This was my favourite part to work on, but it was also the most difficult.
During the process of creating the hair, I noticed that the geometry on the top of the head would not be enough to support the details I wanted to convey, so it was back to Maya to edit it before bringing it back into 3DCoat.
After fixing the geometry issue I had, I was able to finish painting all the hair.

I wanted the last thing I worked on to be the hat, so I moved onto the little weapon she has at her waist.
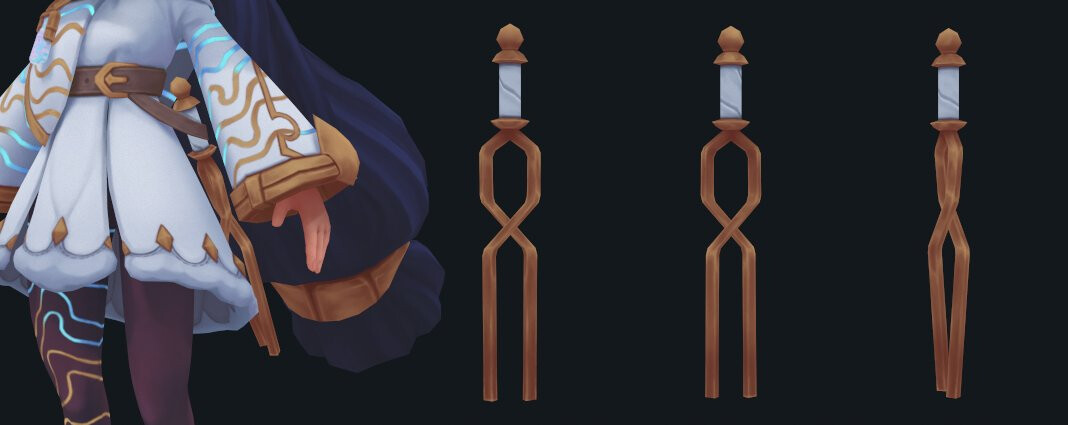
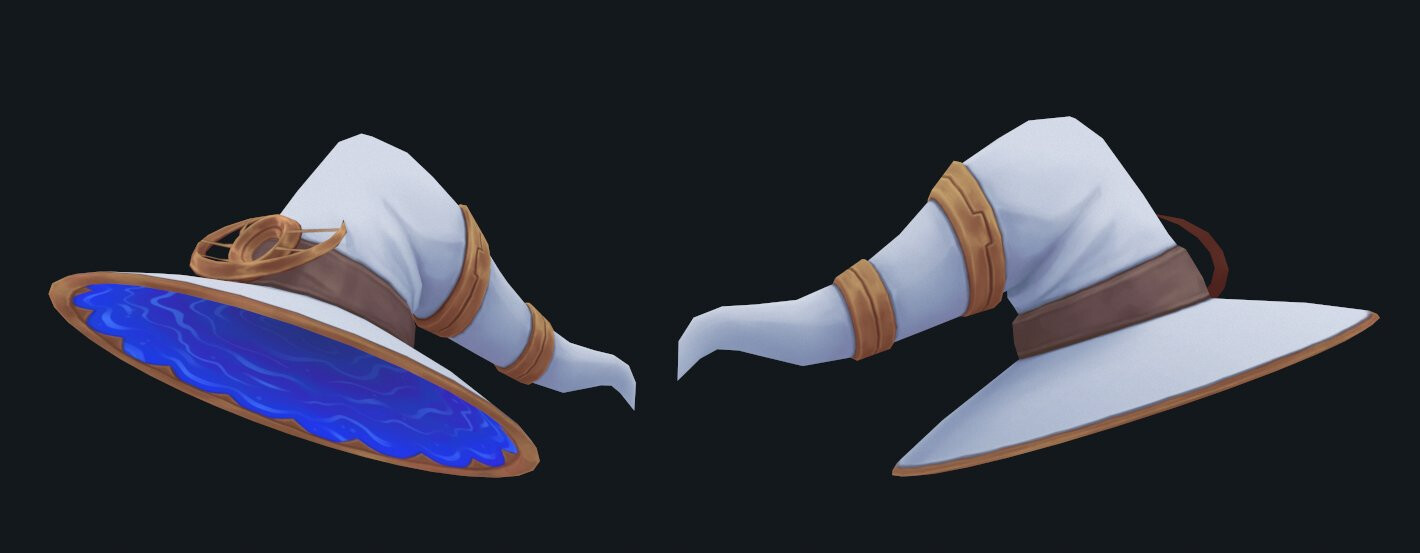
Then, finally, I was left with the hat. I painted the majority of the hat in 3DCoat, but found I needed finer control for the inside so I swapped to Photoshop to finalise the textures.
In Photoshop, I created the Alpha cutout and the swirling squiggles of the inside of the hat.
The Spectral Arms
Now came the part of figuring out how I wanted to go about making the spectral arms.
I knew my technical limitations, which meant no shaders, animated UVs, or cool particle effects could be used.
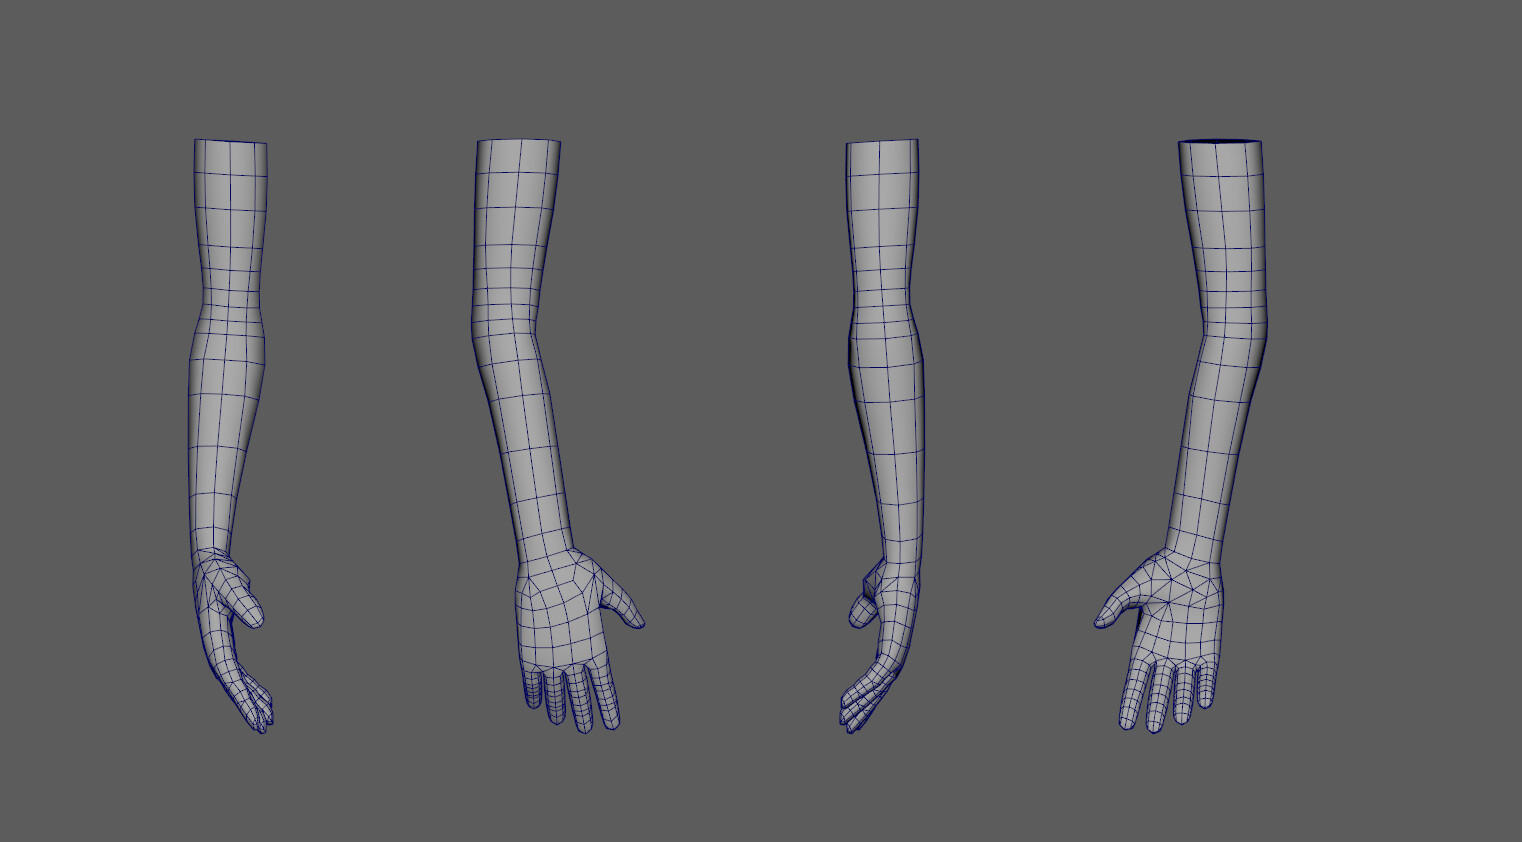
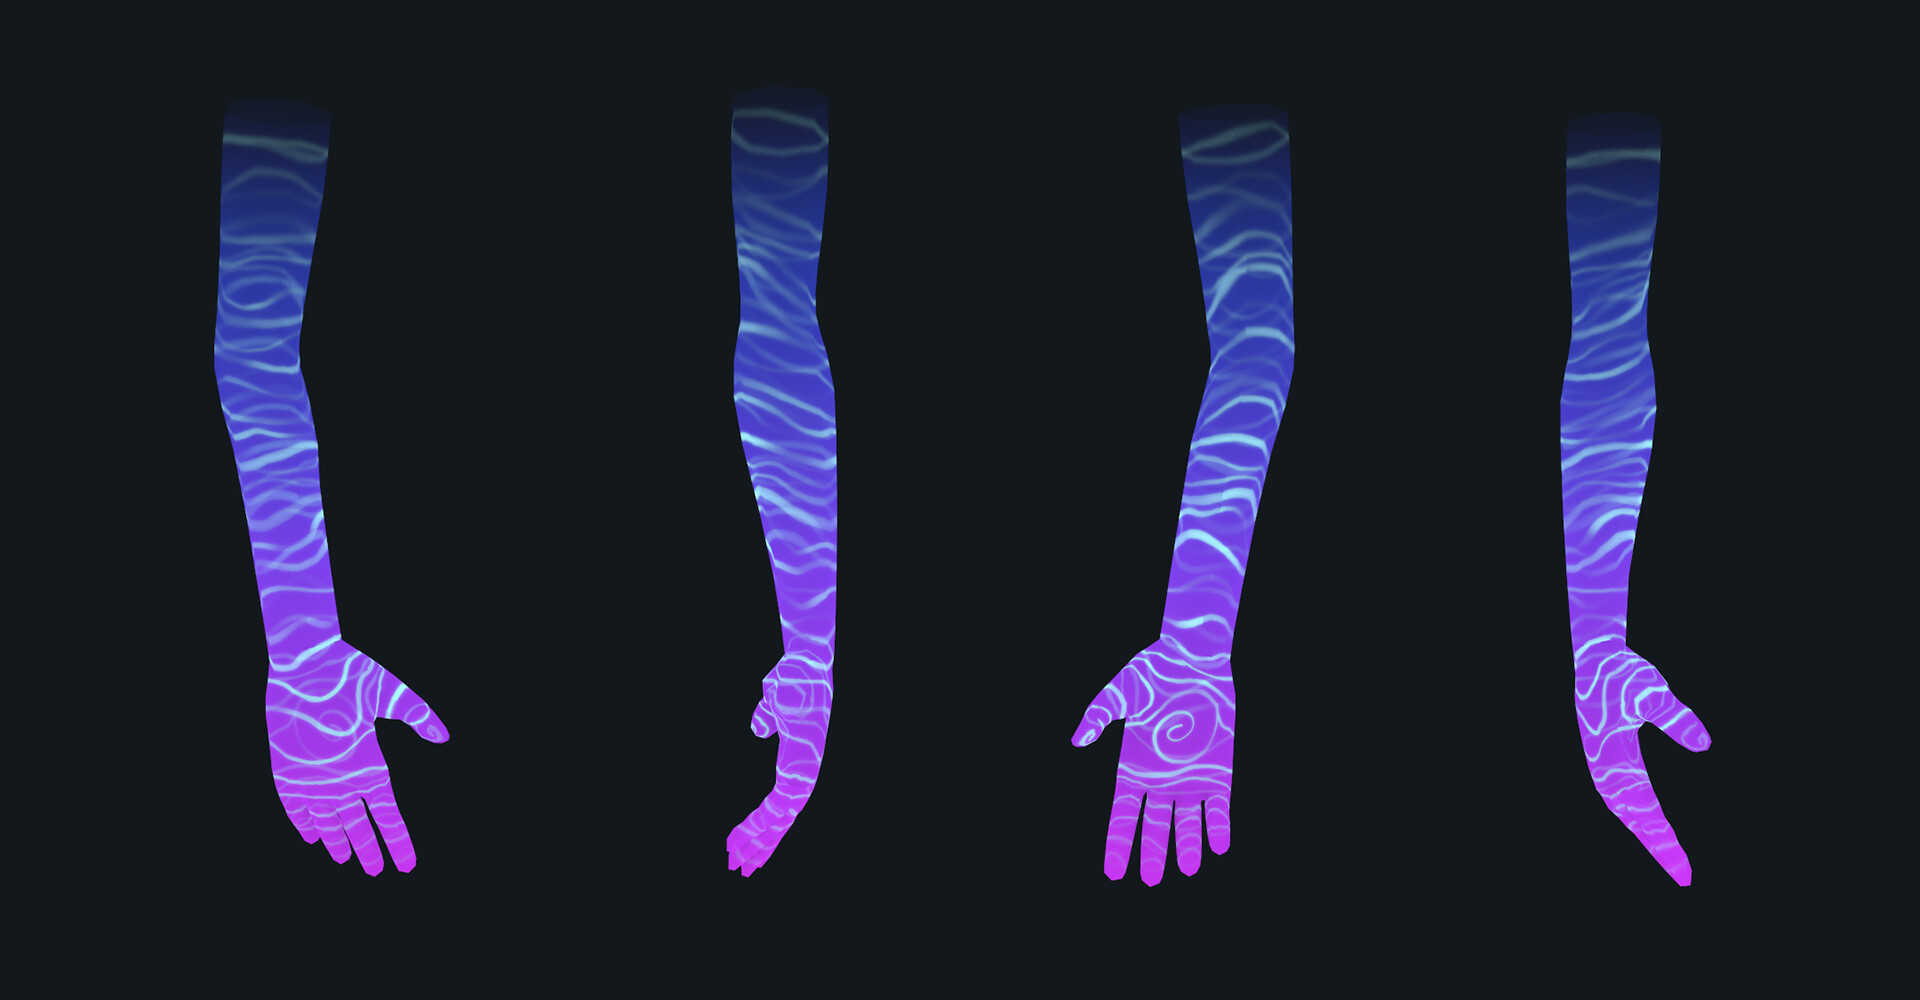
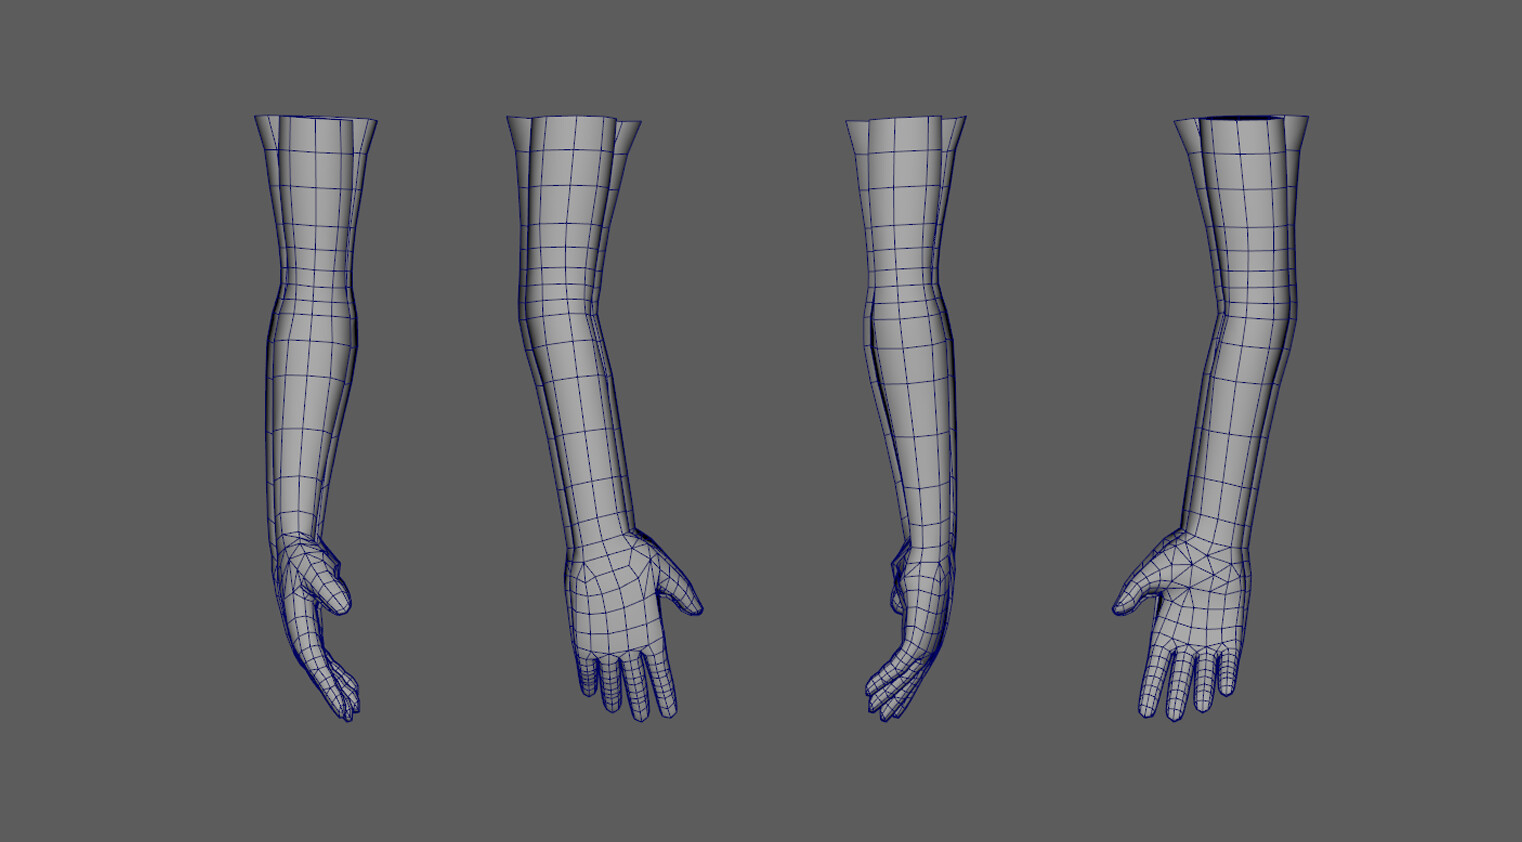
While I thought about the ‘how’, I decided to first make the base of the arm. I did this by extracting the arm from the original base mesh and upscaling it.
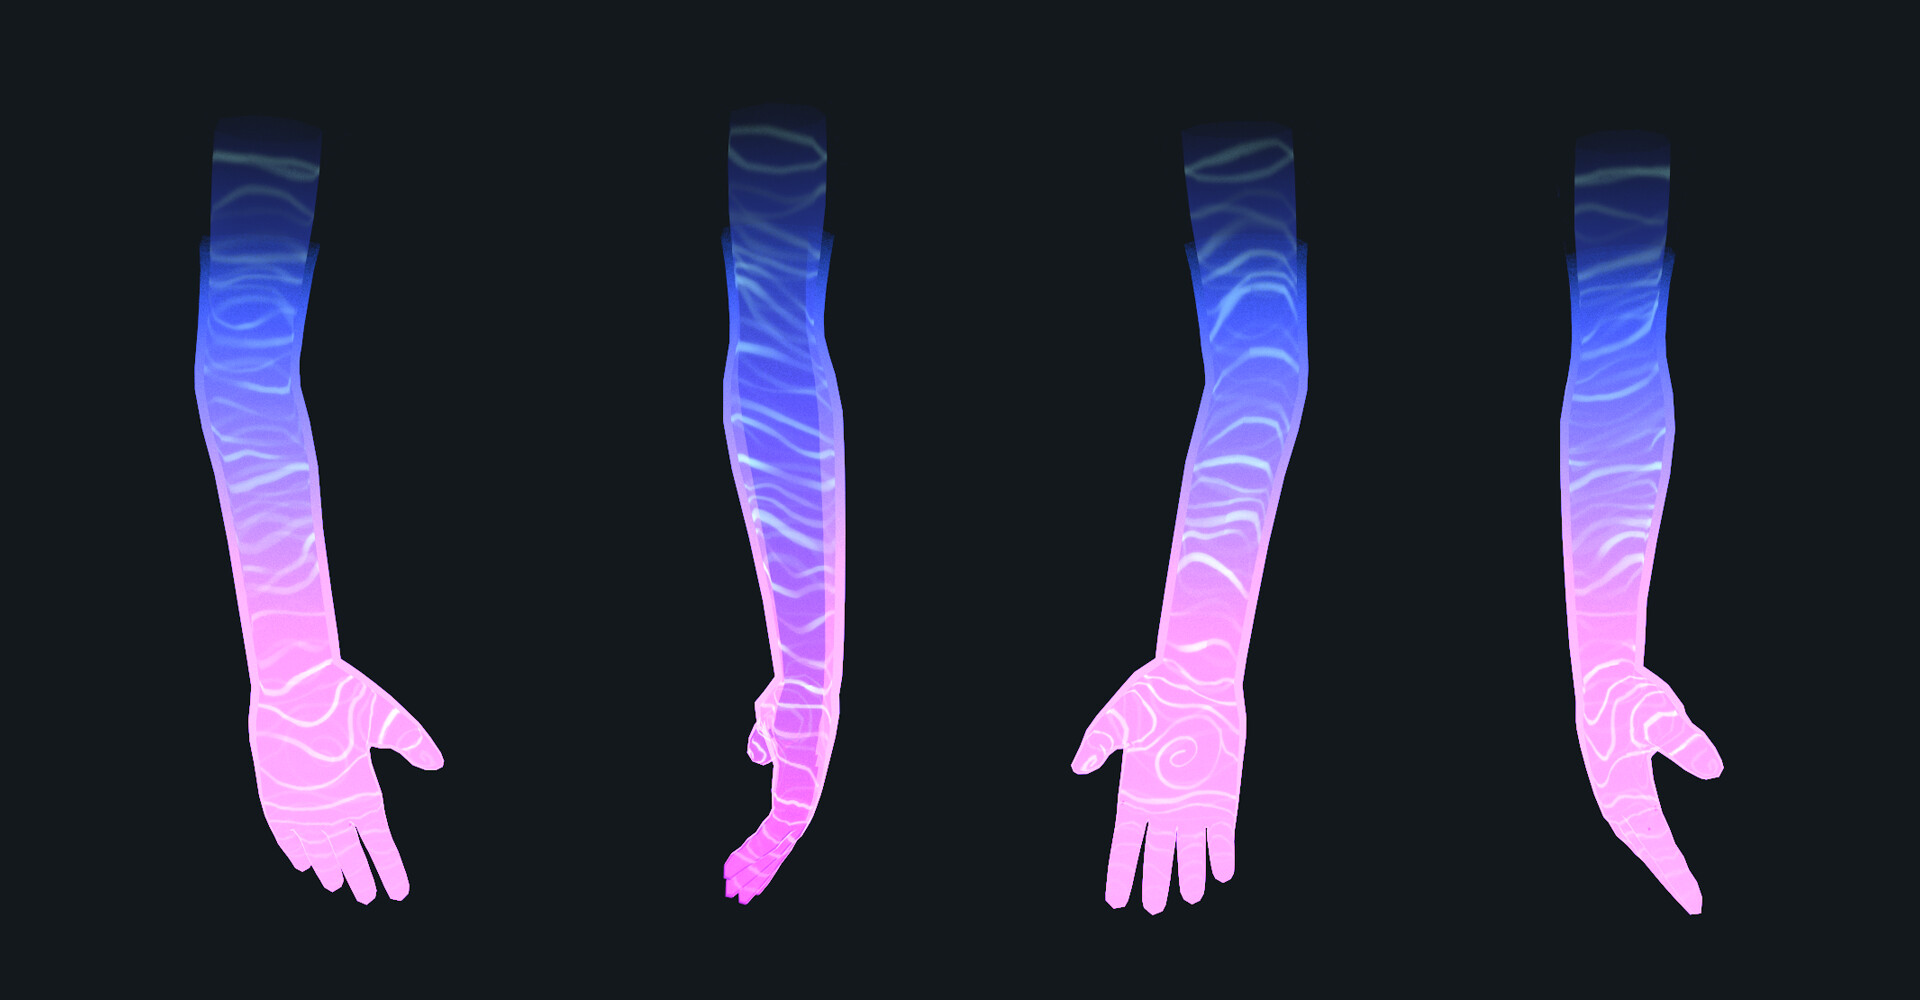
To this I added a top down gradient in 3DCoat with the uppermost colour matching the inside of the hat. I then took it into photoshop to paint the swirly lines on the upper part of the arm.
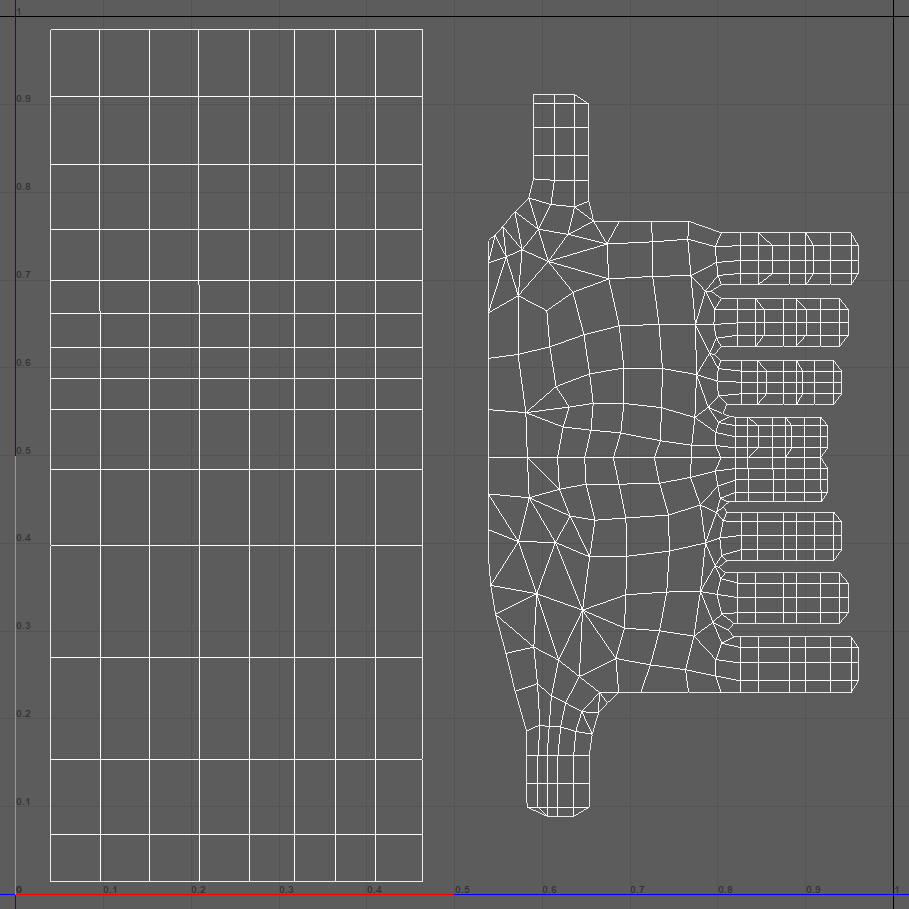
It was at this point I brought it into Substance painter. In Substance Painter I was easily able to paint the hands using the stabiliser. I ran into issues of texel density around the Arm/Hand UV border so I wasn’t able to add as much details as I wished to.
Despite this, I pressed on and finished the base colours.
Still using Substance Painter, I created the Alpha texture. This would be an overall opacity of about 50-60% fading to black at the very top to blend in with the hat. The lines on the arms were also of a lesser opacity than the rest of the arm.
I exported both textures as well as the lines isolated as Black/White Alpha mask. I used this alpha mask to create an emission map to add the line glow. Double sided mesh was kept on.
Now came the part of figuring out how to do the glow. The solution I came up with was similar to how you add lineart to 3D models.
I duplicated the arm mesh, inverted the normals, culled back faces, then scaled up by vertex normal, tapering down towards the fingers. This gave me a larger outline towards the top with a fine glow at the fingertips.
It was then assigned to its own UV Set and scaled to fit.
I tried a few texturing methods to get the glow looking good. At first, I tried more of a grungy/cloudy texture but it ended up looking too dirty and didn’t fit the style. I settled on a simple gradient, one similar to the base gradient of the Spectral Arm. There was also a small alpha gradient to blend the top of the glow into the hat.
When setting up the materials I plugged the diffuse into the emissive map and increased the strength.
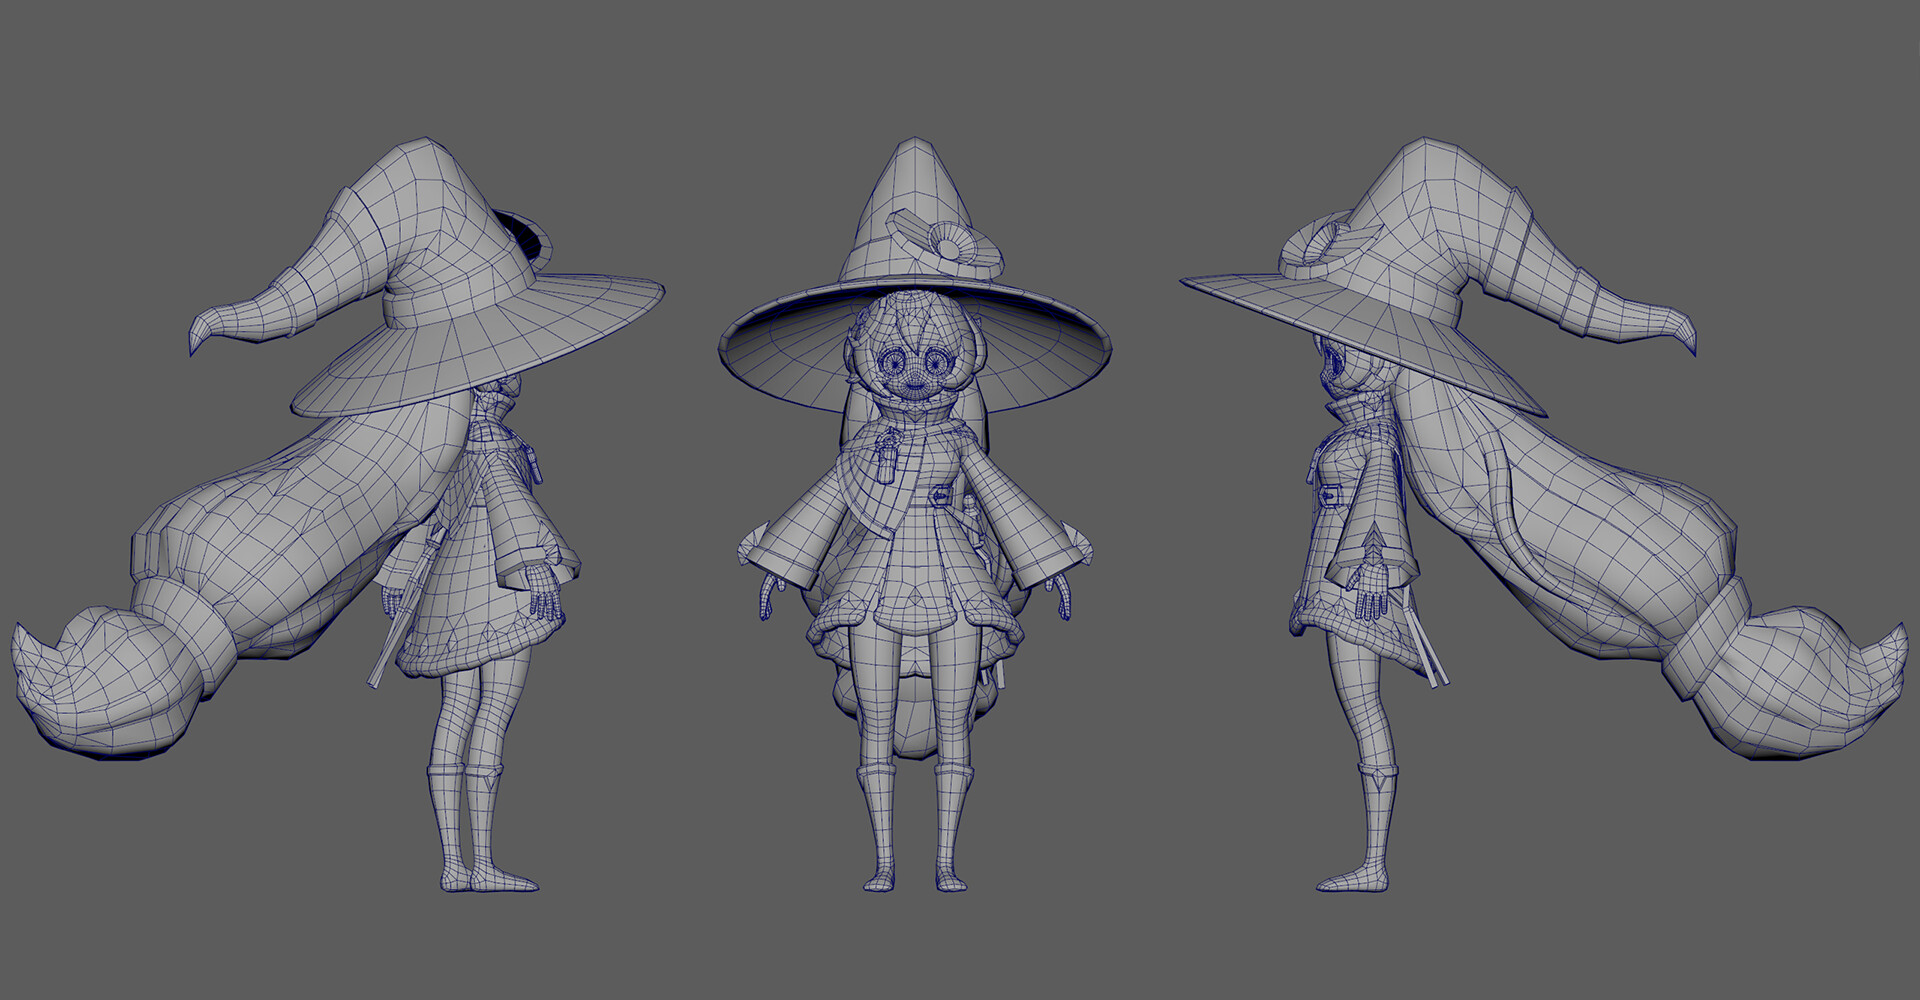
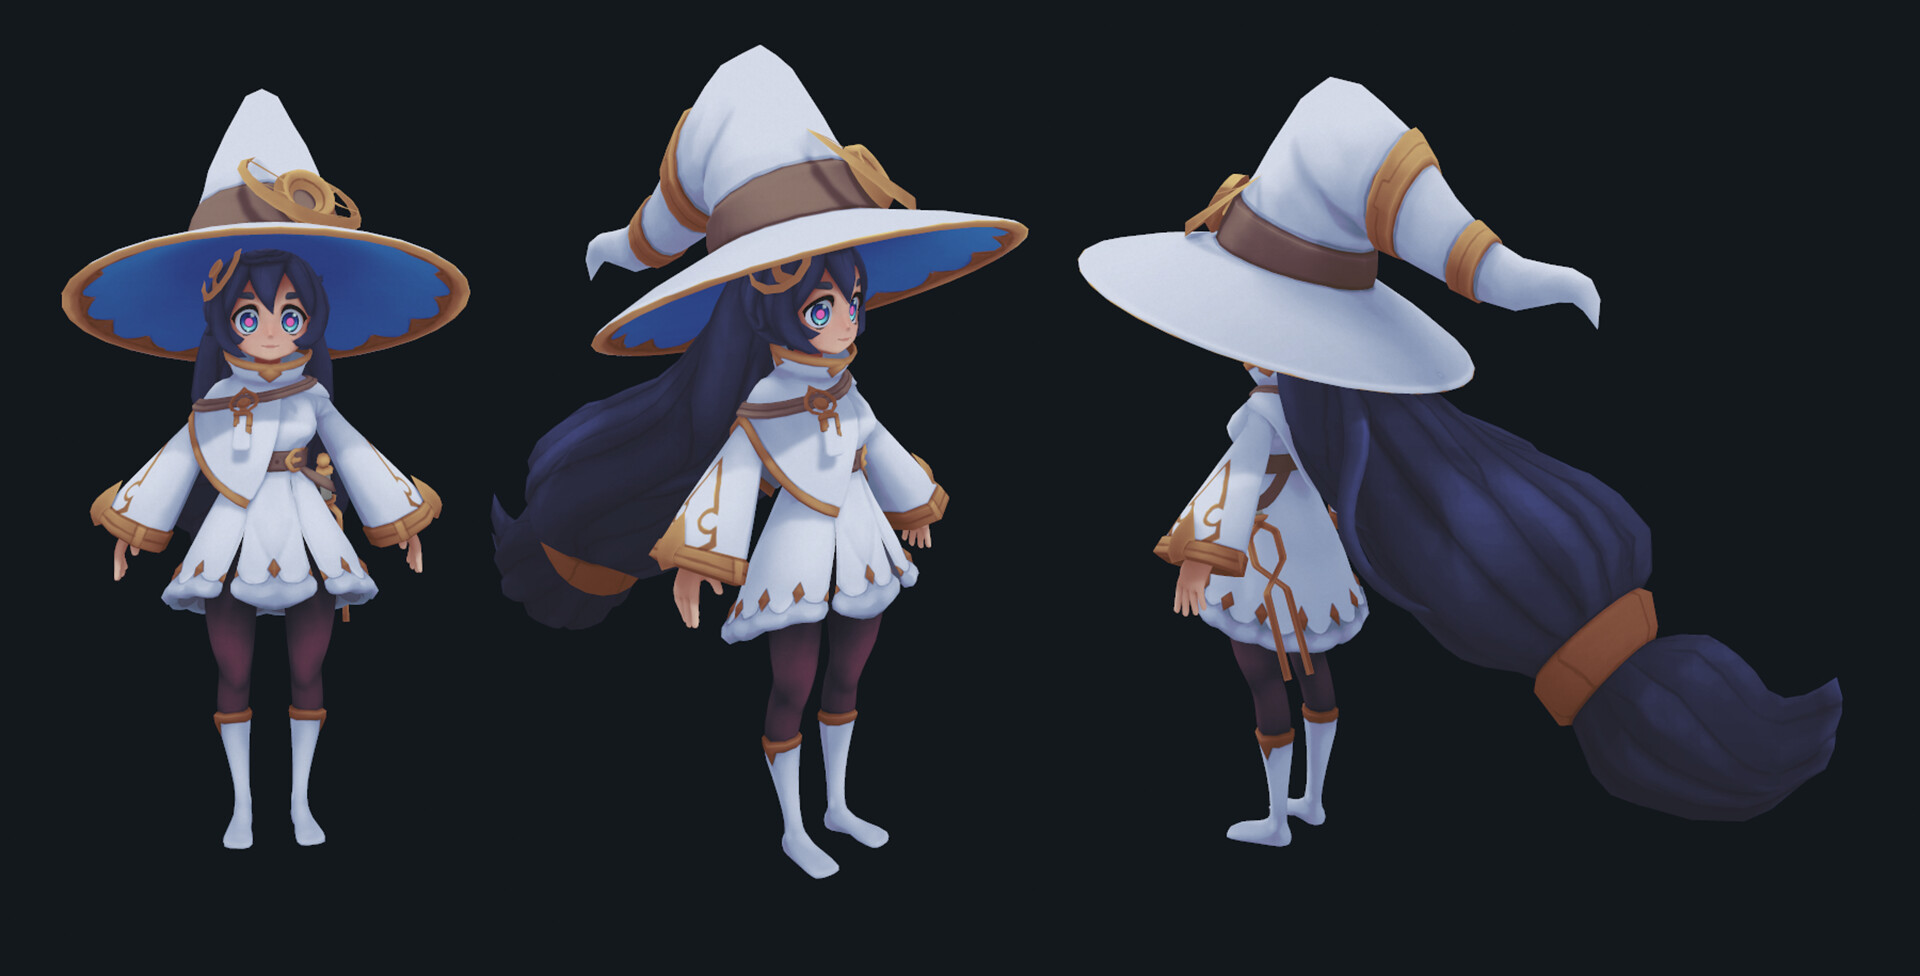
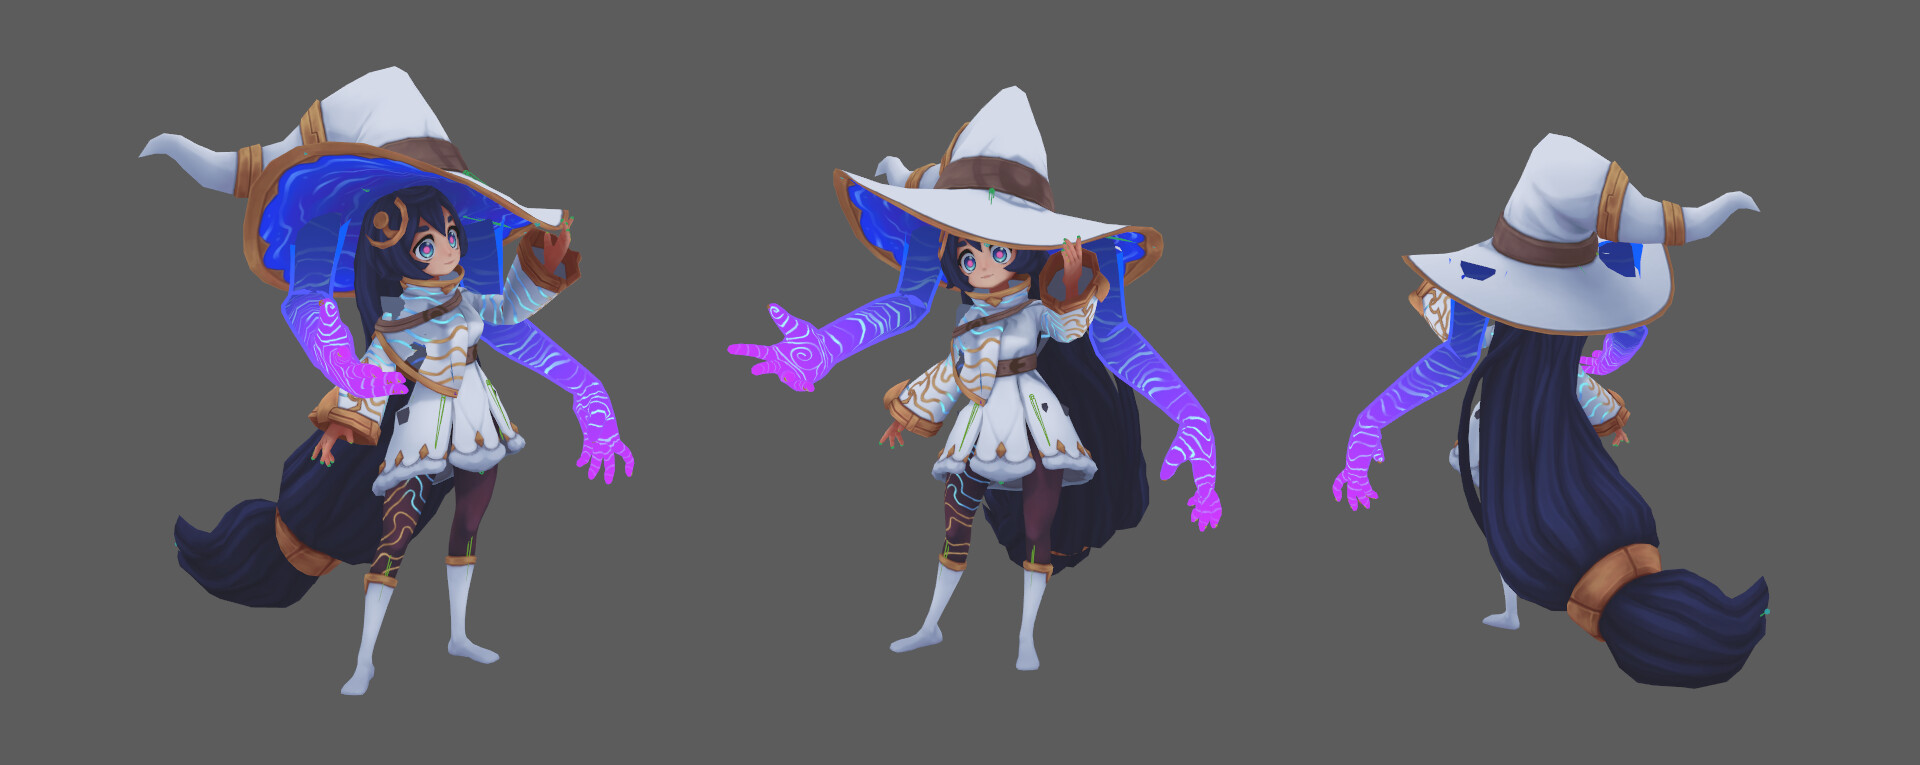
Posing and Final Renders
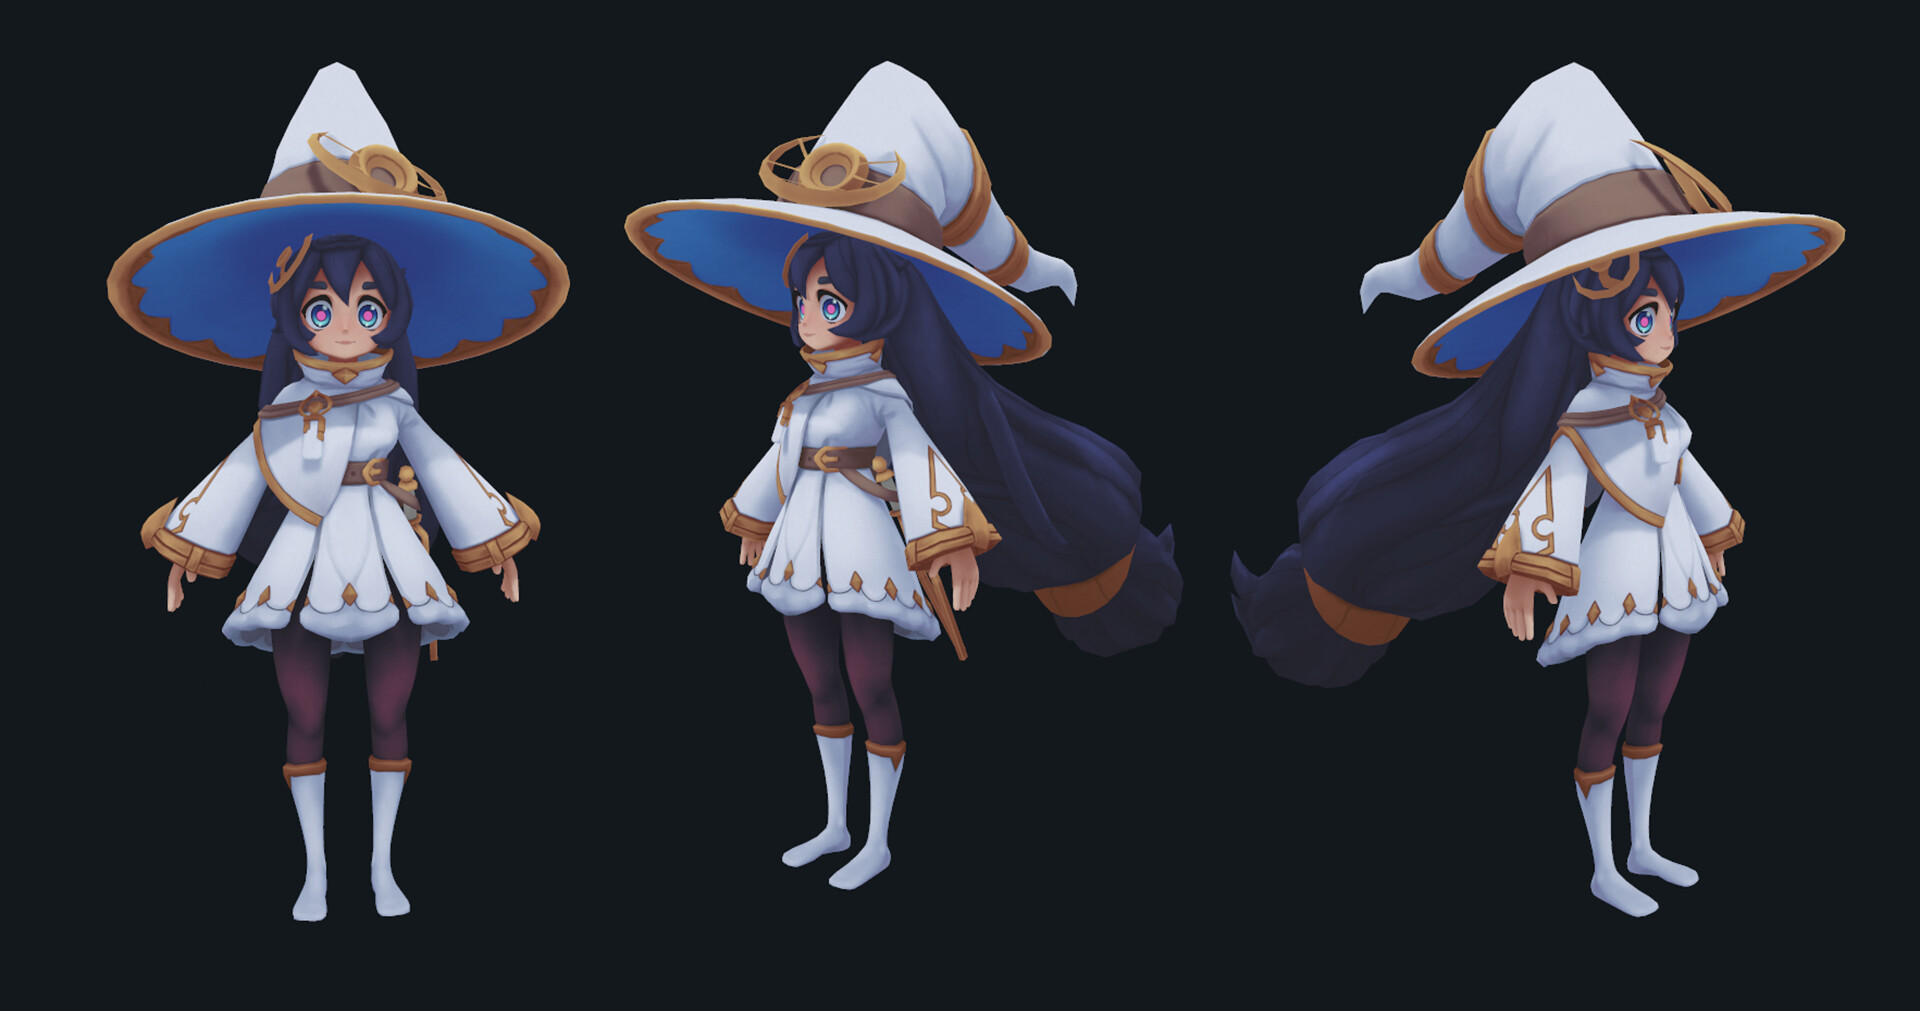
All textures were done so it was time to prepare for final renders. This meant posing the character.
To do this I created a skeleton in Maya and did very basic skinning on the meshes.
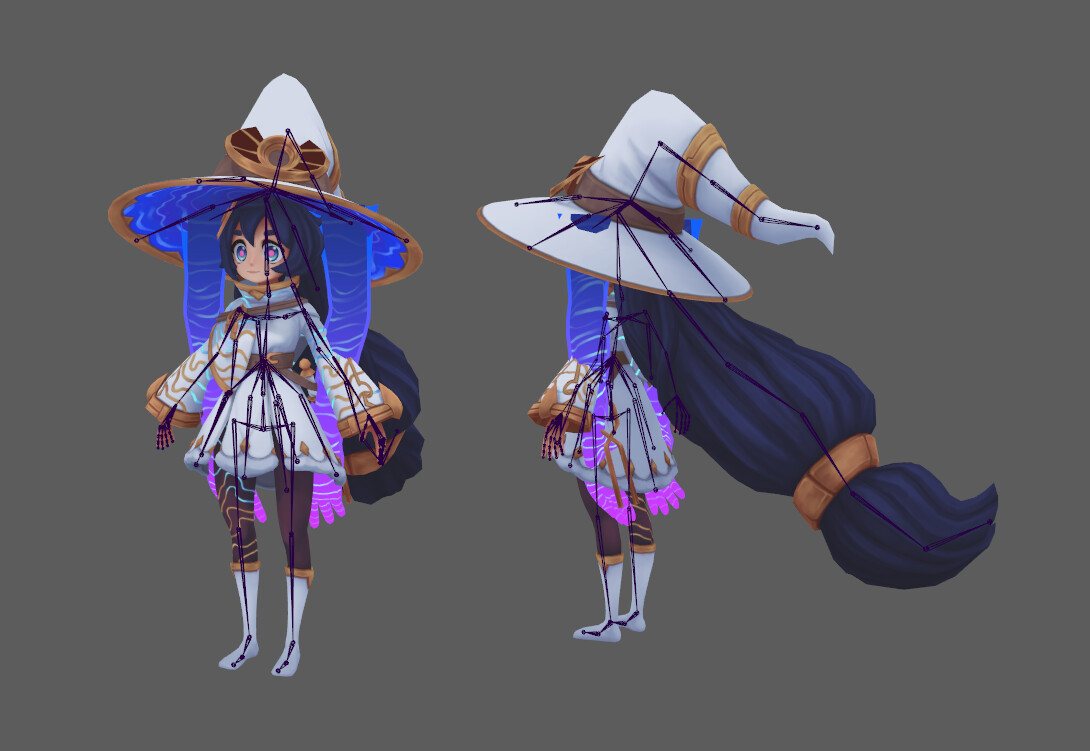
I wanted to copy the pose from the concept image, but I found my geo couldn’t stretch that far without major fixes, so I made a few tweaks.
Because my rig and skinning was very rough, the geometry needed some clean up. I took any mesh that needed cleaning into Zbrush and pushed/smoothed out the geometry until it looked good.
From here, I exported it all back into Maya, made final tweaks, then bundled it all up for export.
In Marmoset, it was time for final renders. I set up all materials, camera angles, drop shadow, and hit that shiny render button.

Final Thoughts
I never intended the project to take this long, but in the end, I’m glad I came back to finish it. I learned a lot about creating an anime styled model, as well as learning that not everything needs heaps of details.
A few days after posting, I found some issues in the geo that now bother me, but I will be more careful to fix that and prevent it from happening in my next project. The density issue on the Spectral Arms also bothered me, but that is something I can avoid in the future.
In the future, I would like to attempt things like this in a game engine so I can add things like animated UVs and particles.